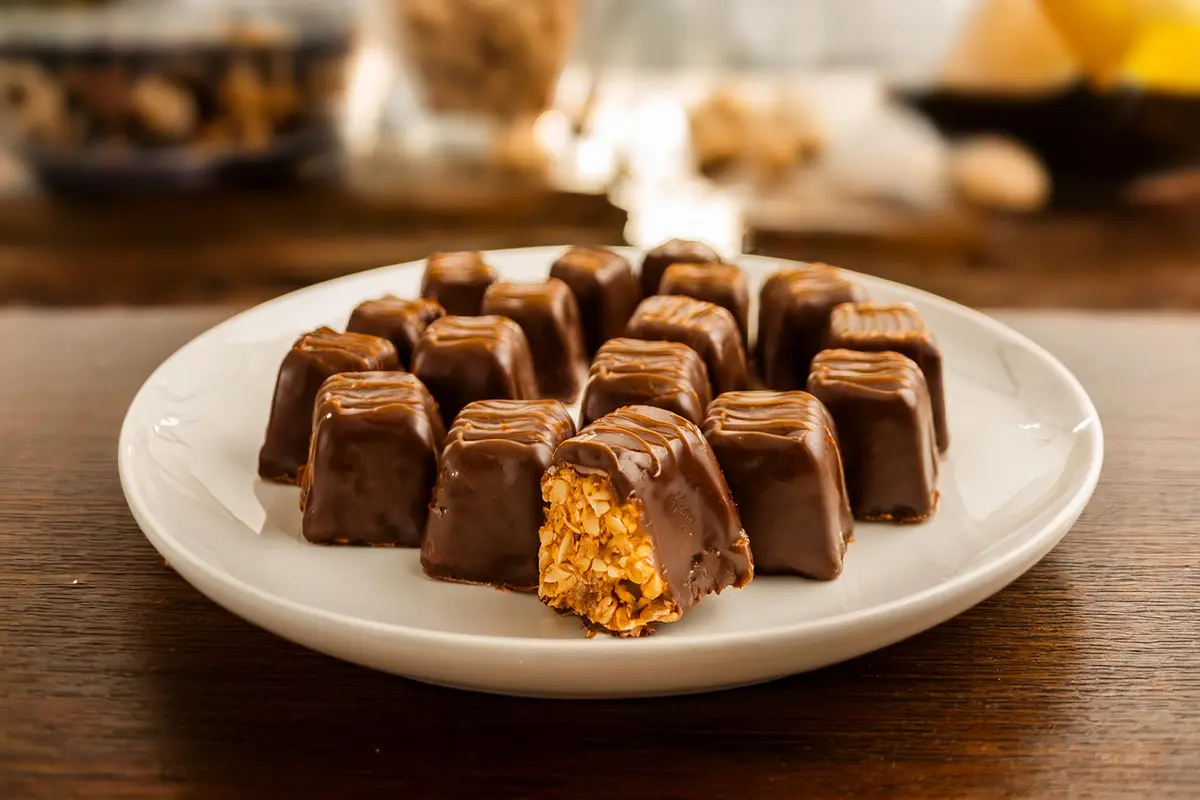
Few things in life are as satisfying as a bite of rich, creamy chocolate caramel candy. This classic treat combines the smooth sweetness of caramel with the deep, luxurious flavor of chocolate to create a confection that delights the senses. Whether you’re a seasoned candy maker or a beginner looking to try your hand at something new, making homemade chocolate caramel candy is a rewarding experience that’s sure to impress your friends and family. In this comprehensive guide, we’ll explore the history of chocolate caramel candy, the science behind making it, and provide a detailed step-by-step recipe to help you create these indulgent treats at home.
The History of Chocolate Caramel Candy
Chocolate and caramel have been a beloved combination for centuries. Caramel, which is essentially sugar that has been cooked until it reaches a rich, amber color, dates back to at least the 17th century when it was first made in Europe. Early caramel candies were simple, made from sugar, butter, and cream. As candy-making techniques evolved, caramel became a popular filling for chocolates in the 19th century, with chocolatiers experimenting with different textures and flavors.
The pairing of chocolate and caramel became a staple in American confectionery by the early 20th century, with brands like Milky Way and Rolo making the combination a household favorite. Today, chocolate caramel candy is enjoyed worldwide, both as a store-bought treat and as a homemade delicacy.
Understanding the Science of Caramel
Before diving into the recipe, it’s important to understand the science behind making caramel. Caramelization is the process of cooking sugar until it melts and turns brown, creating complex flavors and a unique texture. The key to successful caramel is controlling the temperature. Too low, and the sugar won’t caramelize properly; too high, and it will burn, leaving a bitter taste.
Caramel is typically made by heating sugar with water, which helps dissolve the sugar and ensures even cooking. Butter and cream are added to the mixture to create a smooth, creamy texture. The result is a versatile caramel that can be used in a variety of confections, including chocolate caramel candy.
Ingredients for Chocolate Caramel Candy
Making chocolate caramel candy at home requires just a few simple ingredients, most of which you probably already have in your pantry. Here’s what you’ll need:
- Granulated Sugar: The base of the caramel, providing sweetness and structure.
- Light Corn Syrup: Prevents the sugar from crystallizing and helps achieve a smooth texture.
- Unsalted Butter: Adds richness and a creamy consistency to the caramel.
- Heavy Cream: Provides the smooth, velvety texture that makes caramel so indulgent.
- Vanilla Extract: Enhances the flavor of the caramel, adding depth and warmth.
- Sea Salt (optional): For salted caramel, which adds a delightful contrast to the sweetness.
- Dark Chocolate: High-quality chocolate with at least 60% cocoa for a rich, intense flavor.
- Milk Chocolate: Adds a sweeter, milder chocolate flavor that balances the richness of the dark chocolate.
- Flaky Sea Salt (optional): A sprinkle on top adds a gourmet touch to the finished candies.
Tools You’ll Need
To make chocolate caramel candy, you’ll need a few basic tools:
- Heavy-Bottomed Saucepan: For cooking the caramel, ensuring even heat distribution.
- Candy Thermometer: Essential for monitoring the temperature of the caramel.
- Silicone Spatula: For stirring the caramel without scratching your pan.
- 8×8-inch Baking Pan: To set the caramel before cutting.
- Parchment Paper: To line the baking pan and prevent sticking.
- Sharp Knife: For cutting the caramel into pieces.
- Double Boiler (or microwave): For melting the chocolate.
Step-by-Step Recipe for Chocolate Caramel Candy
Now that you have your ingredients and tools ready, let’s dive into the step-by-step process of making homemade chocolate caramel candy.
Step 1: Prepare the Baking Pan
Line an 8×8-inch baking pan with parchment paper, leaving a bit of overhang on the sides to make it easier to lift the caramel out later. Lightly grease the parchment paper with butter or non-stick spray.
Step 2: Make the Caramel
In a heavy-bottomed saucepan, combine 1 cup of granulated sugar, 1/4 cup of light corn syrup, and 1/4 cup of water. Stir gently to combine, then place the saucepan over medium heat. Allow the mixture to cook without stirring until the sugar dissolves and begins to turn a light amber color. This should take about 5-7 minutes.
Once the sugar mixture reaches a light amber color, carefully add 1/2 cup of unsalted butter, cut into pieces. Stir until the butter is fully melted and incorporated. Slowly pour in 1/2 cup of heavy cream while continuing to stir. The mixture will bubble up, so be cautious. Attach a candy thermometer to the side of the pan, ensuring that the tip is submerged in the caramel but not touching the bottom of the pan.
Continue to cook the caramel until it reaches 245°F (118°C) on the candy thermometer. This is the “firm ball” stage, which will give the caramel a chewy texture. Once the caramel reaches the desired temperature, remove the pan from the heat and stir in 1 teaspoon of vanilla extract and a pinch of sea salt (if using). Pour the caramel into the prepared baking pan, spreading it evenly. Allow it to cool at room temperature for at least 2 hours, or until fully set.
Step 3: Melt the Chocolate
While the caramel is cooling, prepare the chocolate coating. Use a double boiler to melt 6 ounces of dark chocolate and 6 ounces of milk chocolate together. If you don’t have a double boiler, you can melt the chocolate in a microwave-safe bowl in 20-second intervals, stirring between each interval until smooth.
Step 4: Cut the Caramel
Once the caramel is fully set, lift it out of the baking pan using the parchment paper overhang. Place the caramel on a cutting board and use a sharp knife to cut it into small squares or rectangles, depending on your preference.
Step 5: Dip the Caramel in Chocolate
Line a baking sheet with parchment paper. Using a fork or candy dipping tool, dip each piece of caramel into the melted chocolate, allowing any excess chocolate to drip off before placing it on the parchment-lined baking sheet. If desired, sprinkle a pinch of flaky sea salt on top of each piece before the chocolate sets.
Step 6: Let the Candies Set
Place the baking sheet in the refrigerator for about 30 minutes, or until the chocolate is fully set. Once set, your chocolate caramel candies are ready to be enjoyed!
Tips for Perfect Chocolate Caramel Candy
- Use a Candy Thermometer: Precision is key when making caramel. A candy thermometer ensures that your caramel reaches the perfect temperature for a chewy, yet soft, texture.
- Choose Quality Ingredients: Since there are only a few ingredients in this recipe, each one plays an important role. Use high-quality chocolate and butter for the best flavor.
- Don’t Rush the Caramel: Cooking the sugar mixture slowly and evenly prevents burning and ensures a smooth, flavorful caramel.
- Experiment with Flavors: While this recipe focuses on traditional chocolate caramel, feel free to experiment by adding spices like cinnamon, a splash of bourbon, or even a hint of coffee to the caramel for a unique twist.
Creative Variations of Chocolate Caramel Candy
While the classic chocolate caramel candy is delicious on its own, there are endless possibilities for creative variations. Here are a few ideas to inspire your candy-making:
Salted Caramel with Sea Salt
Add a sprinkle of flaky sea salt to the top of each chocolate-covered caramel for a perfect balance of sweet and salty flavors. The salt enhances the caramel’s richness and adds a sophisticated touch to the candies.
Nutty Caramel Bites
Before dipping the caramel pieces in chocolate, press a whole almond, pecan, or walnut into each piece. The nuts add a delightful crunch and complement the smooth caramel and chocolate.
Espresso Caramel Candy
For coffee lovers, add 1 teaspoon of instant espresso powder to the caramel mixture before it reaches 245°F. The espresso adds depth to the caramel, creating a rich, mocha-like flavor when combined with the chocolate.
Spiced Chocolate Caramel
Incorporate a pinch of cinnamon, cayenne pepper, or cardamom into the melted chocolate for a warm, spiced flavor that pairs beautifully with the sweet caramel.
Packaging and Gifting Chocolate Caramel Candy
Homemade chocolate caramel candies make a thoughtful and delicious gift for any occasion. To package them attractively, consider the following options:
- Candy Boxes: Use small candy boxes lined with decorative paper or tissue. Arrange the candies in neat rows and tie the box with a ribbon for a polished look.
- Cellophane Bags: Place a few candies in a clear cellophane bag and tie with a festive ribbon. This is a simple yet elegant way to present your homemade treats.
- Mason Jars: Fill a small mason jar with candies, and add a personalized label or tag with a message for the recipient. Mason jars add a rustic charm to your gift.
Storing Chocolate Caramel Candy
To keep your chocolate caramel candies fresh, store them in an airtight container at room temperature for up to two weeks. If you live in a warm climate or if the candies will be stored for longer, refrigerate them to prevent the chocolate from melting. Be sure to separate layers of candies with parchment paper to prevent sticking.
The Joy of Homemade Candy Making
Making chocolate caramel candy at home is not just about creating a delicious treat; it’s also about the joy of crafting something with your own hands. The process of caramelizing sugar, dipping candies in chocolate, and sharing them with loved ones is a rewarding experience that brings warmth and sweetness to any occasion. Whether you’re making these candies for a special event or simply to satisfy a sweet tooth, the effort you put into each step will be evident in every delicious bite.

FAQs About Chocolate Caramel Candy
What type of chocolate should I use for coating the caramel?
High-quality chocolate with at least 60% cocoa is recommended for a rich flavor. You can use dark, milk, or a combination of both depending on your preference.
How can I prevent the caramel from sticking to the knife when cutting?
Lightly coat your knife with non-stick spray or dip it in warm water before cutting. This will help the knife glide through the caramel smoothly.
Can I make these candies ahead of time?
Yes, chocolate caramel candies can be made ahead and stored in an airtight container at room temperature for up to two weeks. For longer storage, keep them in the refrigerator.
Why is my caramel too hard?
If your caramel turns out too hard, it was likely cooked to a temperature higher than 245°F. Be sure to use a candy thermometer and remove the caramel from the heat once it reaches the correct temperature.
Can I use salted butter instead of unsalted butter?
Yes, but if you use salted butter, you may want to reduce or omit the added sea salt in the recipe to avoid the candies being too salty.
Conclusion
Chocolate caramel candy is a timeless treat that combines the best of both worlds: the creamy sweetness of caramel and the rich decadence of chocolate. By following this guide, you can create your own batch of these delicious candies, perfect for sharing or savoring yourself. With a little practice, you’ll master the art of candy making and be able to customize your creations to suit your tastes. Whether you stick to the classic recipe or experiment with creative variations, one thing is certain—homemade chocolate caramel candy is a sweet indulgence that never goes out of style.