Introduction
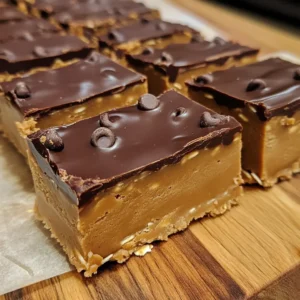
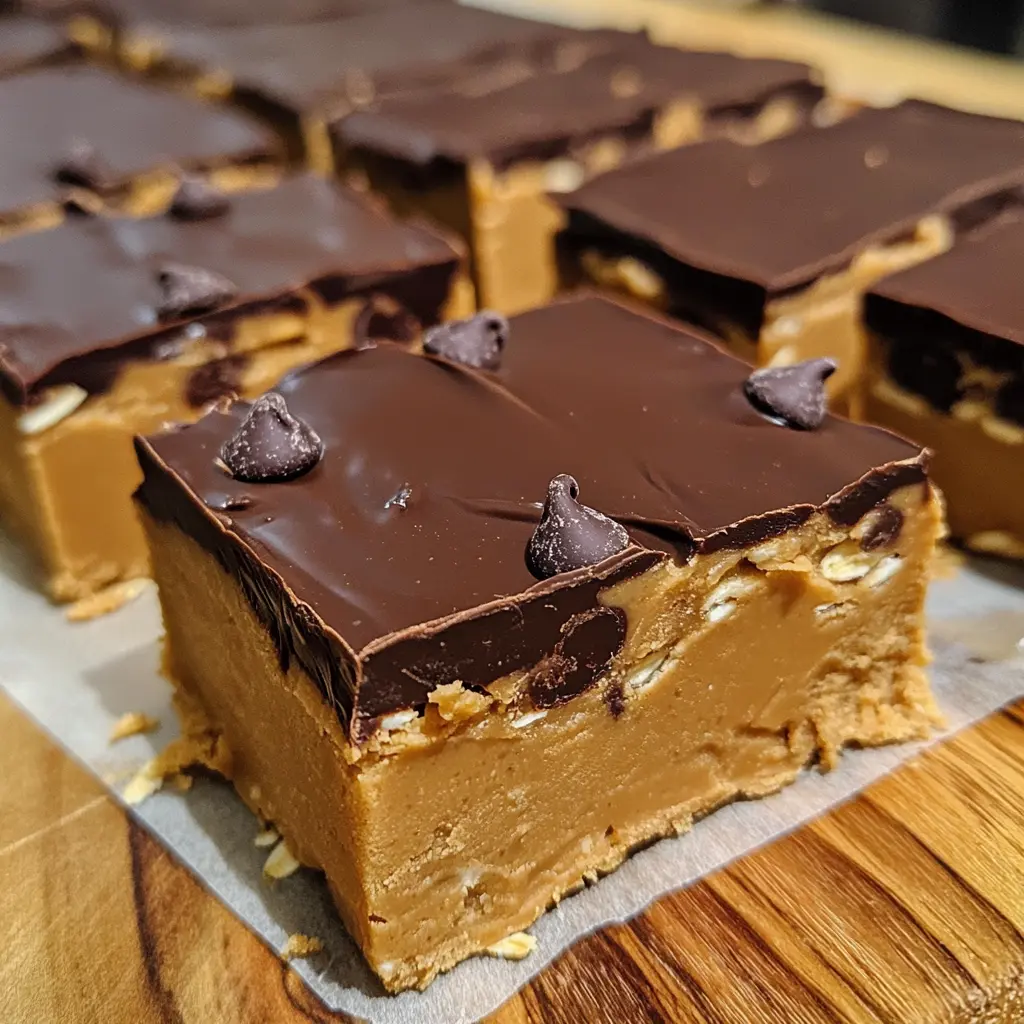
Last Tuesday was one of those mornings. You know the type – alarm didn’t go off, coffee spilled everywhere, and my 7-year-old informed me he needed 24 cupcakes for a school event… in two hours. As I frantically searched the pantry for something – anything – to pack for lunch, I realized I was completely out of granola bars. In desperation, I threw together some peanut butter, oats, honey, and chocolate chips we had lying around. The result? My family now refuses to eat store-bought bars again. What makes these so addictive? Let’s find out…
Why You’ll Love This Recipe
- Ready in under 10 minutes (plus chilling time) – perfect for those “I need something NOW” moments
- No baking required – ideal for summer days when turning on the oven feels criminal
- Tastes like cookie dough but with actual nutritional benefits (I’m not kidding!)
- Customizable based on whatever you have in your pantry
- Kid-approved but sophisticated enough for adults
- Cheaper than store-bought energy bars (seriously, I calculated it)
Ingredients Needed
- 1/2 cup peanut butter (creamy or crunchy)
- 1/4 cup honey or maple syrup
- 1 teaspoon vanilla extract
- 1 cup rolled oats
- 1/4 cup mini chocolate chips
- Pinch of salt
Ingredient Notes
I’ve made these bars approximately 37 times now (no exaggeration) and have some thoughts. Creamy peanut butter creates a smoother texture, while crunchy adds more dimension. Natural peanut butter works but makes slightly softer bars – just chill them longer. For the sweetener, honey gives a more classic cookie dough flavor, while maple syrup offers a slightly more complex taste profile. Either works beautifully!
How to Make It
Step 1: Mix the Wet Ingredients
In a medium mixing bowl, combine the peanut butter, honey (or maple syrup), vanilla extract, and salt. Stir until completely smooth and well incorporated. I like to microwave the mixture for about 15 seconds first if my peanut butter is straight from the fridge – makes everything blend together like a dream.
Step 2: Add the Dry Ingredients
Add the rolled oats to your wet mixture and stir until completely coated. This might take some muscle! The mixture should start to come together and hold its shape when pressed between your fingers. If it seems too wet, add a tablespoon more oats. Too dry? A little more honey works wonders.
Step 3: Fold in the Chocolate Chips
Gently fold in the mini chocolate chips. I emphasize GENTLY here because if your mixture is still warm from the peanut butter, the chips will melt – which honestly isn’t the worst thing, but it changes the final look and texture. If you want distinct chocolate chips throughout, let your mixture cool for about 5 minutes before adding them.
Step 4: Press and Chill
Line a small baking pan (an 8×8 works perfectly, but I’ve used everything from loaf pans to small rectangular containers) with parchment paper, leaving some overhang on the sides for easy removal. Press the mixture firmly into the pan – and I mean FIRMLY. Use the bottom of a measuring cup or glass to really compact it down. This pressing step is crucial for bars that don’t crumble apart later.
Freeze for 1-2 hours until completely set, then use the parchment paper to lift the whole thing out. Cut into bars with a sharp knife (I usually get 8-10 bars depending on how generous I’m feeling).
Nutritional Information
- Calories: Approximately 165 per bar (based on 8 bars per recipe)
- Protein: 5g per bar
- Healthy Fats: 9g per bar
- Carbs: 18g per bar
- Sugar: 9g per bar (mostly from honey/maple syrup)
- Fiber: 2g per bar
Key Ingredients Breakdown + Health Benefits
Peanut Butter: Besides being absolutely delicious, peanut butter provides plant-based protein and healthy monounsaturated fats that help keep you satisfied. It also contains vitamin E, magnesium, and potassium. My husband was skeptical about peanut butter as a “health food” until I showed him the research on how its protein-fat combination helps stabilize blood sugar. Now he asks for these bars specifically before his afternoon meetings to avoid the 3 PM energy crash.
Rolled Oats: These little powerhouses are full of fiber (particularly beta-glucan), which helps keep you full longer. They’re also packed with important minerals like manganese, phosphorus, and magnesium. My daughter calls these her “brain bars” because I told her once that the complex carbs in oats provide steady energy for thinking. Marketing to children: complete success.
Honey/Maple Syrup: While still a form of sugar, these natural sweeteners contain beneficial compounds that processed sugar doesn’t have. Honey has antimicrobial properties and antioxidants, while maple syrup contains minerals like zinc and manganese. I find I need less honey than I would white sugar to achieve the same sweetness, which is a nice bonus.
Dark Chocolate Chips: The mini semi-sweet chips I use contain antioxidants called flavonoids, which have been linked to heart health benefits. Plus, the small hit of chocolate satisfies sweet cravings without going overboard. Let’s be honest, though – I include chocolate chips mostly because life’s too short not to have chocolate daily in some form!
Why This Recipe Works
There’s actual food science behind why these simple ingredients create such magic together. The sticky combination of peanut butter and honey forms a perfect binding matrix that holds the oats in place. Chilling solidifies the fats in the peanut butter, creating that perfect firm-but-chewy texture.
What I love most is the textural contrast – you get the chewiness from the oats, the creaminess from the peanut butter, and little bursts of chocolate throughout. The salt is non-negotiable in my opinion – it balances the sweetness and makes all the flavors pop.
The no-bake method preserves the integrity of the ingredients, especially the oats, which retain their hearty texture and nutritional profile. Plus, the bars develop even better flavor after a day in the fridge as everything melds together – if they last that long in your house (they certainly don’t in mine).
Is This Recipe Right for You?
These bars are perfect for busy parents, workout enthusiasts, hikers, or anyone who needs quick energy that doesn’t come from a drive-thru window. My kids take them to school, my husband grabs one before his morning run, and I’ve been known to eat one (ok, sometimes two) as a pre-deadline writing snack. They’re especially perfect if you hate complicated recipes or if turning on the oven feels like too much commitment.
Who Should Avoid It?
Obviously, these aren’t suitable for anyone with peanut allergies (though I’ll cover substitutions below). They’re not low-calorie, so if you’re strictly counting calories rather than focusing on nutrient density, you might want to adjust portion sizes. While naturally gluten-free if you use certified gluten-free oats, they do contain honey, so they’re not vegan unless you substitute maple syrup.
Customization Ideas
- Nut Butter Options: Swap the peanut butter for almond, cashew, or sunflower seed butter (the last one makes these school-friendly!)
- Add-ins: Try adding 2 tablespoons of chia seeds, hemp hearts, or ground flaxseed for an omega-3 boost
- Flavor Boosters: 1/4 teaspoon cinnamon, a tablespoon of cocoa powder, or 2 tablespoons of protein powder change up the flavor profile
- Texture Enhancers: Fold in 2 tablespoons of chopped dried cranberries, raisins, or shredded coconut
- Decadent Version: Drizzle the finished bars with melted dark chocolate for special occasions (Tuesday counts as a special occasion in my book)
Kitchen Tools You’ll Need
- Medium mixing bowl (nothing fancy required)
- Sturdy spoon or spatula (this mixture gets thick!)
- Measuring cups and spoons
- 8×8 baking pan or something similar (even a loaf pan works in a pinch)
- Parchment paper (trust me, don’t skip this)
- Sharp knife for cutting the chilled mixture
I’ve made these in hotel rooms with just a bowl and a spoon, so don’t worry if your kitchen isn’t fully equipped!
Pro Tips & Common Mistakes
Pro Tip #1: Toast the oats first! Spread them on a baking sheet and toast at 350°F for 8-10 minutes until fragrant. This simple step enhances their nutty flavor dramatically. Let them cool completely before adding to the mixture.
Pro Tip #2: For extra-clean cuts, chill the bars completely, then run your knife under hot water and wipe dry before each cut. Restaurant-worthy presentation with minimal effort!
Common Mistake #1: Not pressing the mixture firmly enough. The most common reason for crumbly bars is gentle pressing. Really compact that mixture down with force – I sometimes place a piece of parchment on top and use my body weight through a flat-bottomed glass.
Common Mistake #2: Using old, dry peanut butter. That forgotten jar from the back of your pantry might affect both flavor and texture. Fresh, well-mixed peanut butter makes a huge difference.
Common Mistake #3: Cutting bars too soon. I know it’s tempting to just take a quick peek, but patience yields bars that hold together beautifully. I’ve ruined more than one batch through sheer impatience!
Serving Suggestions
For breakfast, I pair a bar with some fresh berries and Greek yogurt for a balanced meal that keeps me full until lunch. My kids love them straight from the fridge as an after-school snack with a cold glass of milk.
For a quick dessert, warm a bar in the microwave for 10 seconds and top with a small scoop of vanilla ice cream – it tastes like a fancy deconstructed cookie sundae!
When I pack these for hikes or road trips, I wrap each bar individually in parchment paper and store them in a hard container so they don’t get squished. They hold up remarkably well even on hot days, though the chocolate chips might get a bit melty.
Reader Success Stories
Maria from Colorado writes: “I’ve been making these every Sunday for three weeks straight. My teenagers actually get out of bed when they smell the toasted oats! I add a scoop of chocolate protein powder to the mix and they’re perfect after sports practice.”
Tom from Seattle shares: “As a single dad who can barely boil water, these bars have been a game-changer. My 6-year-old helps make them, and she’s so proud when she takes them in her lunch. We call them ‘dinosaur power bars’ because apparently that makes them taste better to kindergartners!”
Jenn from Florida tells us: “I’m pregnant and these have saved me during my first trimester. When nothing else sounds good, I can always eat one of these bars. I make a double batch and keep them in the freezer. My husband steals them too, so I’ve started hiding them behind the frozen vegetables where he’ll never look!”
Storing & Freezing Guide
These bars will keep in an airtight container in the refrigerator for up to a week, but honestly, they’ve never lasted that long in my house. The texture is best straight from the fridge – firm enough to hold their shape but still pleasantly chewy.
For longer storage, these freeze beautifully! Wrap individual bars in parchment paper, then place in a freezer-safe bag or container. They’ll keep for up to 3 months. You can eat them straight from the freezer (they don’t freeze rock-hard due to the honey and peanut butter) or let them thaw for about 15 minutes at room temperature.
Pro storage tip: Place a small piece of parchment between stacked bars to prevent them from sticking together.
FAQs
Q: Can I use quick oats instead of rolled oats? A: Absolutely! Quick oats will give you a softer, more uniform texture. Rolled oats provide more chew and texture. Either works perfectly fine – it’s just personal preference.
Q: My mixture seems too dry and crumbly. What did I do wrong? A: This usually happens with natural peanut butter that’s less oily or if your measuring cup of oats was a bit too heaping. Simply add an extra tablespoon of honey or a teaspoon of melted coconut oil to bring it together.
Q: Can I make these without any sweetener to reduce sugar? A: I’ve tested this, and while they’ll hold together with just peanut butter, the flavor balance is off. Instead, try reducing the honey to 2-3 tablespoons and using dark chocolate chips with a higher cocoa percentage.
Q: How do you stop yourself from eating the entire batch at once? A: Honestly, I’m still figuring this out myself! But seriously, freezing individual portions helps tremendously with portion control.
Final Thoughts
What started as a morning kitchen panic has become our family’s favorite snack. These bars remind me that sometimes the best recipes are born from necessity and whatever happens to be in your pantry. They’ve saved us money, rescued countless hangry moments, and honestly, taste better than anything I could find at the store.