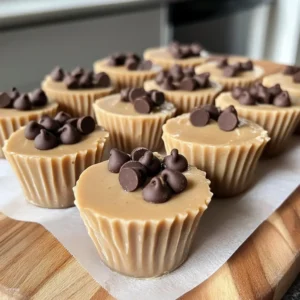
I discovered these frozen cups during the severe heat wave in 2024. The temperature was 45 degrees, the AC was struggling, and the kids were melting down. Out of desperation, I found Greek yogurt and peanut butter in the refrigerator. After twenty minutes of mixing and two hours of freezing, these little cups saved our sanity. They’re delicious and nutritious enough to have for breakfast!
Why You’ll Love This Recipe
- Just 5 simple ingredients you probably already have on hand
- Takes literally 5 minutes to mix together (I’ve timed it during desperate moments)
- Perfectly portion-controlled, which saves me from myself
- The perfect balance of protein, healthy fats, and just enough sweetness
- Satisfies ice cream cravings without the sugar crash afterward
- Kids think they’re getting dessert for snack (sometimes I don’t correct them)
- Endlessly customizable for whatever flavor you’re craving
- No ice cream maker or fancy equipment needed
Ingredients Needed
- 1/2 cup Greek yogurt
- 1/3 cup peanut butter
- 1 tablespoon honey or maple syrup
- 1/4 teaspoon vanilla extract
- 1–2 tablespoons mini chocolate chips (optional, but highly recommended)
Ingredient Notes
Let’s talk Greek yogurt – I find full-fat works best here as it freezes with a creamier texture and less iciness. If you’re watching calories, 2% is a good compromise, but I wouldn’t go with non-fat (I tried once and they were noticeably more icy and less creamy). For peanut butter, natural works beautifully, but make sure it’s well-stirred. That oil separation can make your cups grainy if not mixed properly. I learned this the hard way when I lazily used peanut butter straight from a new jar without stirring – the frozen cups tasted more like frozen oil on top and dry peanut paste underneath. Not my finest culinary moment!
How to Make It
Step 1: Mix Your Base
In a medium bowl, combine the Greek yogurt, peanut butter, honey (or maple syrup), and vanilla extract. I usually start with a fork, but as it thickens, switching to a spatula helps. Mix until completely smooth with no yogurt streaks. The consistency should be thick but spoonable – somewhere between frosting and pancake batter.
Step 2: Portion and Prepare
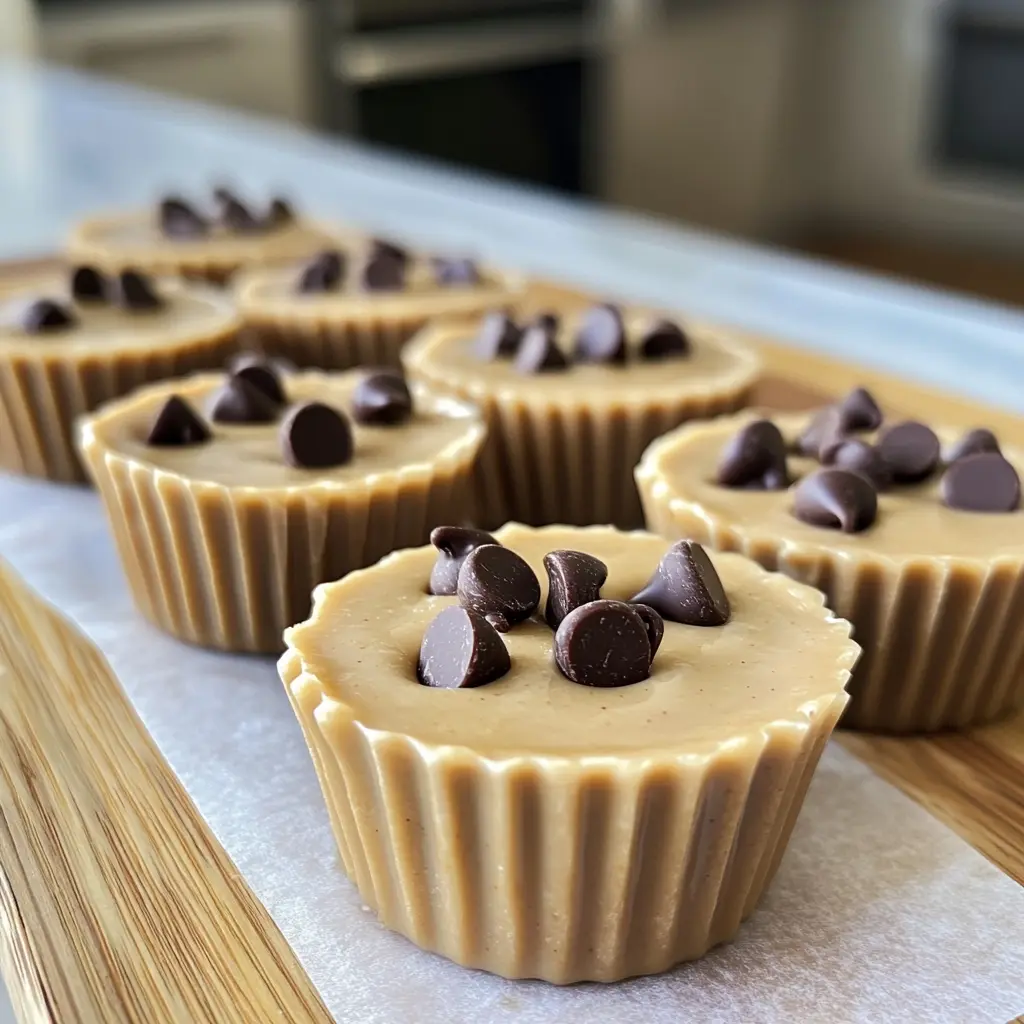
Spoon the mixture into silicone muffin cups or a silicone mini muffin tray. I usually make 6-8 regular-sized cups or about 12-14 mini cups, depending on how hungry my family is. Silicone is really key here – I tried paper liners once, and they were a nightmare to peel off when frozen. Trust me on this!
Step 3: Add Some Joy
Sprinkle those mini chocolate chips on top of each cup. They’ll sink slightly into the mixture but mostly stay near the top, creating a perfect chocolate bite when you dig in. I’ve found mini chips work much better than regular ones, which can become too hard when frozen and sometimes fall off.
Step 4: Freeze to Perfection
Place your cups in the freezer for 1-2 hours until completely solid. The exact time depends on your freezer temperature and the size of your cups. Mini cups might be ready in just an hour, while larger ones usually need the full two hours or sometimes longer.
Nutritional Information
- Calories: About 85-95 per regular-sized cup
- Protein: 5g per cup
- Healthy Fats: 6g per cup
- Carbs: 5g per cup
- Sugar: 3g per cup (mostly from honey/maple syrup)
These numbers are approximate and based on making 8 cups with the recipe.
Key Ingredients Breakdown + Health Benefits
Greek Yogurt – This tangy protein powerhouse is what makes these cups filling enough to be a legitimate snack, not just a treat. The probiotics in yogurt support gut health, while the protein helps maintain stable blood sugar levels. I switched from regular yogurt to Greek years ago and never looked back – the extra protein means these cups actually satisfy instead of leaving me hunting for more snacks 20 minutes later.
Peanut Butter – Beyond that irresistible flavor we all know and love, peanut butter adds healthy monounsaturated fats that help your body absorb vitamins and keep you feeling full. It also adds a bit more protein to the mix. I’ve tried fancy almond butter in this recipe, but honestly, good old peanut butter has the best flavor balance with the tangy yogurt. My husband says the peanut butter is what makes these “taste like actual dessert instead of health food in disguise.”
Honey/Maple Syrup – Just a touch of natural sweetness goes a long way here. What I love is that this small amount actually tastes sweeter when frozen than it would at room temperature. I’ve experimented with different amounts, and one tablespoon really is the sweet spot – enough to satisfy your sweet tooth without overwhelming the other flavors or adding too much sugar. My sister prefers maple syrup for its complex flavor, while my kids vote for honey every time.
Vanilla Extract – Don’t skip this! That tiny 1/4 teaspoon makes a huge difference. I accidentally left it out once, and while the cups were still good, they lacked that certain something that makes them taste like dessert rather than just frozen yogurt and peanut butter. Real vanilla extract has compounds that enhance and round out the other flavors, especially the chocolate chips.
Mini Chocolate Chips – These little bursts of chocolate make each bite exciting. The mini size is perfect because they distribute better and don’t freeze too hard. The slight bitterness of the chocolate (especially if you use semi-sweet or dark) balances the sweetness and creaminess of the other ingredients beautifully. When my kids have friends over, the chocolate chip-topped cups disappear first, every single time.
Why This Recipe Works
The genius of these frozen cups lies in their balanced composition. The fat content from both the Greek yogurt and peanut butter prevents them from freezing rock-solid like water-based popsicles would. Instead, they freeze to a scoopable, creamy consistency similar to gelato.
The peanut butter doesn’t just add flavor – it changes the freezing properties of the yogurt, creating a smoother texture that resists ice crystallization. Science in your dessert! I’ve tried making frozen Greek yogurt cups without the peanut butter, and they were noticeably more icy and less pleasant to eat.
What really makes this recipe special is how it satisfies both creamy and sweet cravings with minimal added sugar. The natural fat in the peanut butter and yogurt provides that rich mouthfeel we crave in desserts, while the tiny bit of honey gives just enough sweetness to make it feel like a treat.
I’ve served these to guests who were genuinely shocked when I revealed they weren’t “real” ice cream cups. One fitness-minded friend calculated the protein content on the spot and immediately asked for the recipe. Success!
Is This Recipe Right for You?
You’ll love these frozen cups if you’re someone who craves ice cream but is trying to make healthier choices. They’re perfect for parents looking for nutritious treats to offer kids during hot weather, fitness enthusiasts wanting a protein-packed dessert, or anyone managing their sugar intake without feeling deprived.
If you meal prep or like having emergency treats on hand (we all need those, right?), these are ideal because they keep in the freezer for weeks. I almost always have a batch ready to go for surprise visitors or my own sudden cravings.
They’re also great for anyone who struggles with portion control – each cup is its own perfect serving, so there’s no temptation to keep scooping from a large container.
Who Should Avoid It?
If you have a peanut allergy, this specific recipe isn’t for you (though see my customization ideas below for alternatives). They’re also not suitable for vegan diets due to the Greek yogurt, though again, there are substitutions you can make.
If you’re following an extremely strict low-carb diet that excludes all honey or maple syrup, you might want to substitute a keto-friendly sweetener (though I find the small amount of honey used here fits within most moderate low-carb approaches).
Customization Ideas
- Swap the peanut butter for almond, cashew, or sunflower seed butter
- Add 1/4 teaspoon cinnamon for a warm spice note
- Mix in 2 tablespoons of cocoa powder for a chocolate peanut butter version
- Replace chocolate chips with chopped fresh strawberries or raspberries
- Swirl in 1 tablespoon of strawberry jam for a PB&J inspired cup
- Add 1 tablespoon of unsweetened shredded coconut for texture
- For a banana split vibe, mix in half a mashed ripe banana
- Top with a sprinkle of sea salt flakes for a sweet-salty flavor explosion
Kitchen Tools You’ll Need
- Silicone muffin cups or mini muffin tray (seriously, silicone is key here)
- Medium mixing bowl
- Measuring cups and spoons
- Mixing spoon or spatula
- Freezer-safe container for storage
- Level freezer shelf (learned this the hard way after ending up with tilted cups!)
Pro Tips & Common Mistakes
Give them a few minutes to soften before eating. I usually take them out of the freezer and let them sit for about 2-3 minutes before digging in. The texture is much better – creamy rather than hard. My impatient husband once broke a plastic spoon trying to eat one straight from the freezer!
The proportions really matter. Too much yogurt makes them icy, while too much peanut butter makes them too rich and they won’t freeze properly. The ratio in this recipe creates the perfect creamy frozen texture.
Stir until completely smooth. Any pockets of unmixed ingredients will create texture issues when frozen. The first time I made these, I rushed the mixing and ended up with little pockets of frozen Greek yogurt that were much tangier than the surrounding mixture.
If your cups stick in the molds, run the bottom of the silicone mold under warm water for a few seconds. They’ll pop right out! I discovered this trick after nearly destroying a batch trying to pry them out with a knife. Not my proudest kitchen moment.
For the smoothest result, make sure your Greek yogurt isn’t expired or close to its date. Older yogurt can be more acidic and sometimes separates slightly when frozen, affecting both taste and texture.
Serving Suggestions
These frozen cups are perfect on their own as a quick snack or light dessert, but there are so many ways to enjoy them:
For a simple dessert, I sometimes drizzle a tiny bit of warm honey or chocolate sauce over the top just before eating. The temperature contrast is fantastic.
My kids love to sandwich two mini cups around a sliced strawberry for what they call “fancy ice cream sandwiches.”
For breakfast, I’ll chop one cup into pieces and mix it with fresh berries for a sweet protein boost alongside my morning coffee.
They also make a perfect post-workout treat – the protein helps with recovery while the cold is refreshing after a hot summer run. My running buddy calls them “protein pucks” and requests them after our Saturday morning jogs.
Reader Success Stories
“These have saved me from so many ice cream binges! I make a double batch every weekend, and they’re my go-to when the kids are having actual ice cream and I don’t want to feel left out.” – Melissa
“My picky 4-year-old who ‘hates yogurt’ devours these. I’ve started using them as a reward for trying new vegetables at dinner. Whatever works, right?” – Jordan
“I’m 7 months pregnant and dealing with gestational diabetes. These cups have been a lifesaver for my sweet cravings without spiking my blood sugar. The midwife actually asked for the recipe!” – Aisha
Storing & Freezing Guide
These cups will keep in the freezer for up to 1 month if stored properly. After the initial freeze in the silicone molds, pop them out and transfer to a freezer-safe container or zip-top bag with parchment paper between layers to prevent sticking.
If you notice any freezer burn or ice crystals forming after a couple of weeks, it’s usually a sign that they weren’t covered tightly enough. They’re still safe to eat but might be slightly less creamy.
Pro Tip: I label the container with the date and flavor (especially when I start experimenting with variations). It seems unnecessary until you find yourself staring at multiple containers of frozen things months later with no idea what’s what. Learn from my mistakes!
FAQs
Can I use regular yogurt instead of Greek yogurt? Regular yogurt has more water content and less protein, which will make your cups icier when frozen. If it’s all you have, strain it through a coffee filter for 1-2 hours in the refrigerator first to remove excess liquid.
My cups turned out too hard to eat. What went wrong? This usually happens if the fat content was too low. Make sure you’re using full-fat or at least 2% Greek yogurt, and don’t reduce the amount of peanut butter called for in the recipe.
Can I make these vegan? Absolutely! Use a plant-based Greek-style yogurt (coconut or almond-based work well) and make sure your chocolate chips are vegan. The texture might be slightly different, but they’ll still be delicious.
How can I make these sweeter without adding more honey? Try adding 1/4 teaspoon of cinnamon, which enhances perceived sweetness, or use a very ripe mashed banana in the mixture, which adds natural sweetness. You could also use vanilla-flavored Greek yogurt, which typically has some added sweetness.
Final Thoughts
What began as a desperate attempt to cool down on a scorching summer day has become one of my family’s favorite year-round treats. I love that these Peanut Butter Greek Yogurt Frozen Cups sit at that perfect intersection of healthy and delicious – satisfying enough to feel like a real treat, but nutritious enough that I can say yes when my kids ask for them before dinner occasionally.