Introduction
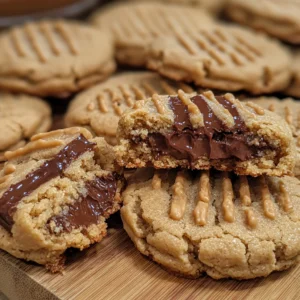
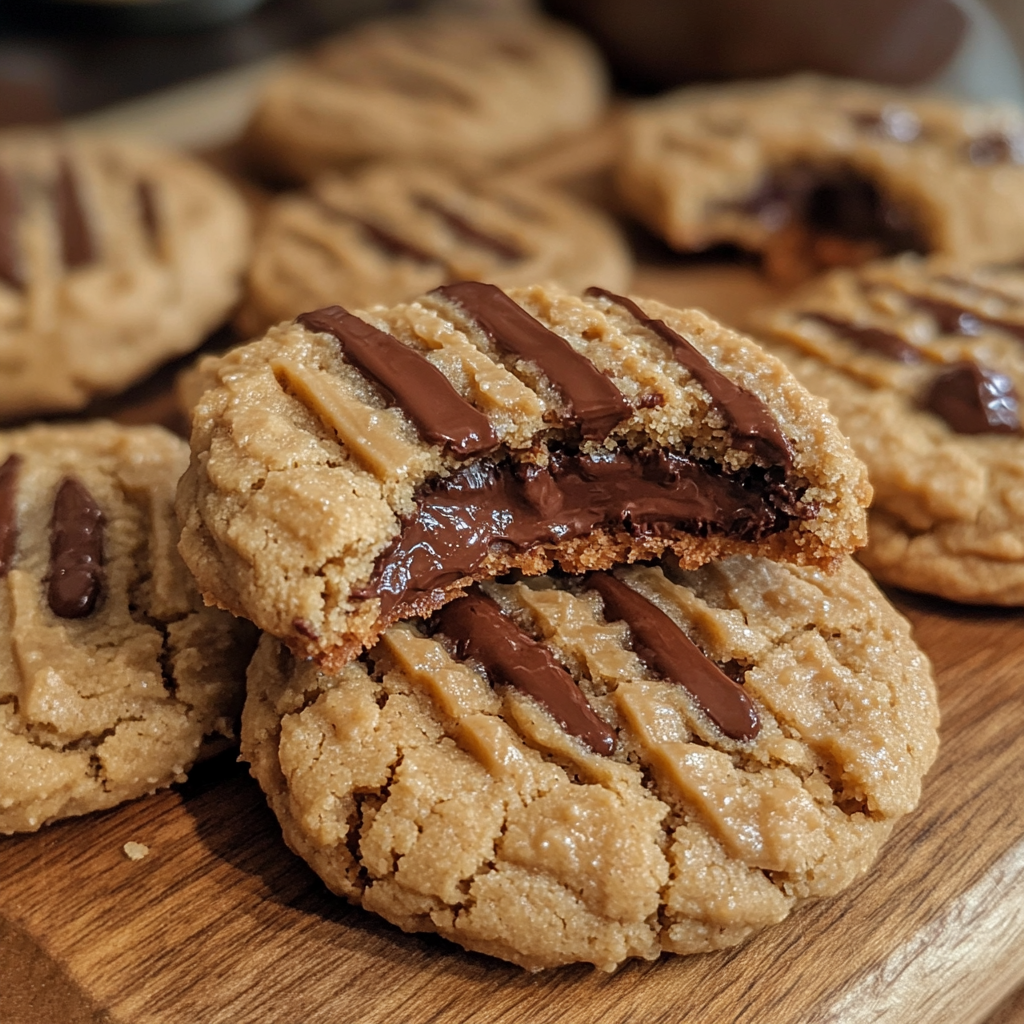
It was a desperate Friday night when these cookies were born. My sister texted she was “dropping by” with her kids—aka please have snacks. With no butter or brown sugar, I grabbed what I had: peanut butter, Greek yogurt, and a handful of hidden chocolate chips. The magic? Stuffing the chocolate inside for a gooey, molten center. It looks fancy, but it’s secretly the easiest cookie I’ve ever made.
Why You’ll Love This Recipe
- Secretly nutritious but tastes completely indulgent
- Protein-packed (about 5g per cookie!) to actually satisfy your hunger
- No refined sugar—sweetened naturally with honey or maple syrup
- The dramatic “ooze factor” when you break one open warm
- Only 8 simple ingredients you likely already have
- One-bowl wonder that comes together in minutes
Ingredients Needed
- 1/2 cup peanut butter
- 1/4 cup Greek yogurt
- 1/4 cup honey or maple syrup
- 1 egg
- 1 teaspoon vanilla extract
- 1/2 cup oat flour
- 1/2 teaspoon baking powder
- Mini chocolate chips or chunks (for centers)
- Pinch of salt
Ingredient Notes
The peanut butter debate is real with these cookies. I’ve made them with both natural (just peanuts) and commercial varieties—both work, but give slightly different results. Natural peanut butter creates a more tender, melt-in-your-mouth texture, while the stabilized commercial stuff gives you a chewier cookie that holds its shape better. For the chocolate center, I’ve found that chocolate chunks create the most dramatic melty middle, but mini chips work beautifully too. Dark chocolate adds a lovely bitterness that balances the sweet cookie, but my niece insists milk chocolate is the only way to go. For the Greek yogurt, full-fat gives you the richest result, but even nonfat works reasonably well here (unlike in many baked goods where fat content is more critical).
How to Make It
Step 1: Set the Stage
Preheat your oven to 350°F (175°C) and line a baking sheet with parchment paper. Don’t skip the parchment! I tried using just cooking spray once, and it was a sticky disaster that had me chiseling cookies off the pan. Not fun, especially with eager little hands waiting.
Step 2: Mix the Wet Team
In a medium bowl, combine the peanut butter, Greek yogurt, honey (or maple syrup), egg, and vanilla extract. Mix until completely smooth and well-blended. I find a fork works surprisingly well for this job—better than a whisk for breaking down the peanut butter without incorporating too much air. The mixture should look glossy and uniform, with no streaks of yogurt remaining.
Step 3: Add the Dry Squad
Add the oat flour, baking powder, and salt directly to your wet ingredients. Stir gently until just combined. The dough will be softer than traditional cookie dough—somewhere between cookie dough and thick cake batter. Don’t panic! This is exactly what you want. Resist the urge to add more flour; I made this mistake the second time I baked these and ended up with dry hockey pucks instead of tender cookies.
Step 4: The Chocolate Surprise
Here’s where the magic happens. Scoop about 1.5 tablespoons of dough into your hand, flatten it slightly, place a few chocolate chips or a chocolate chunk in the center, then fold the dough around it, sealing well and shaping into a cookie. Place on the prepared baking sheet, leaving about 2 inches between cookies as they will spread slightly. I like to press down just slightly on the tops to flatten them a bit—not too much, just enough to keep them from being perfectly domed.
Bake for 9-12 minutes, until the edges are set but the centers still look slightly underdone. This is CRUCIAL. The first time I made these, I baked them until they looked completely done, and the centers solidified as they cooled. Trust the process—they’ll continue to firm up after coming out of the oven, while maintaining that perfect gooey center.
Nutritional Information
- Calories: Approximately 135 per cookie (based on recipe making 12 cookies)
- Protein: 5g per cookie
- Healthy Fats: 7g per cookie
- Carbs: 14g per cookie
- Fiber: 1.5g per cookie
- Sugar: 7g per cookie (from natural sources)
Key Ingredients Breakdown + Health Benefits
Peanut Butter: Beyond the irresistible flavor, peanut butter brings plant-based protein and healthy monounsaturated fats to these cookies. These fats help slow digestion, keeping you satisfied longer than typical cookies. It also contains resveratrol, an antioxidant that’s good for heart health. I’ve accidentally opened new jars of peanut butter specifically for this recipe more times than I care to admit—that’s how worthwhile these cookies are.
Greek Yogurt: The secret weapon in this recipe! Greek yogurt adds moisture and tenderness while boosting the protein content significantly. It also adds a subtle tang that balances the sweetness perfectly. The probiotics don’t survive baking, but the calcium and protein certainly do. When my fitness-obsessed brother discovered these had Greek yogurt in them, he started calling them “gains cookies,” which honestly, might be a better name.
Oat Flour: I love using oat flour in these cookies because it adds a subtle nutty flavor that complements the peanut butter beautifully. Nutritionally, it brings more fiber and protein than white flour while keeping these naturally gluten-free. The first time I made these, I didn’t have store-bought oat flour, so I blended rolled oats in my blender until fine—works perfectly and saves you buying another ingredient.
Why This Recipe Works
The science behind these cookies is what makes them special. Traditional cookies rely on creamed butter and sugar for structure and sweetness. Here, the peanut butter provides the fat, while the protein in both the peanut butter and Greek yogurt creates structure. The result is a cookie that’s paradoxically tender yet holds together well.
The minimal mixing required is actually beneficial—it prevents gluten formation (even though oat flour doesn’t contain gluten, overmixing can still make baked goods tough) and keeps the cookies soft and tender. The slightly higher moisture content from the yogurt helps the cookies stay soft for days, unlike traditional cookies that often dry out quickly.
What really surprised me when developing this recipe was the temperature effect. Cold dough straight from the refrigerator bakes up thicker with a more dramatic gooey center, while room temperature dough spreads more and gives you a thinner cookie with a wider melty middle. Both are delicious—it just depends on your preference!
Is This Recipe Right for You?
If you’re looking to satisfy a sweet tooth without derailing your healthy eating goals, these cookies are perfect. They’re ideal for parents wanting to serve better-for-you treats, athletes looking for a protein boost with their indulgence, or busy people who want a quick homemade cookie without hauling out the stand mixer and dirtying multiple bowls.
They’re also great for anyone monitoring their refined sugar intake but unwilling to give up dessert (I fall squarely in this category). And if you’re the type who always breaks open a cookie to check the center before taking a bite—these were made for you.
Who Should Avoid It?
These cookies aren’t suitable for those with peanut allergies, though sunflower seed butter can work as a substitute. They contain eggs, so they’re not vegan-friendly without modifications. Since they do contain natural sugars from honey/maple syrup and chocolate, they may not be appropriate for those on very strict low-sugar diets.
Customization Ideas
- Roll the dough balls in chopped nuts before baking for added crunch
- Add 1/4 teaspoon of cinnamon to the dough for a warm spice note
- Swap the peanut butter for almond or cashew butter
- Use white chocolate for the centers for a different flavor profile
- Add a tiny pinch of sea salt on top before baking for a sweet-salty contrast
- Mix 1 tablespoon of cocoa powder into the dough for double chocolate cookies
- Press a raspberry into the center along with the chocolate for a fruit surprise
Kitchen Tools You’ll Need
- Medium mixing bowl
- Measuring cups and spoons
- Fork or wooden spoon for mixing
- Cookie scoop or tablespoon
- Baking sheet
- Parchment paper
- Cooling rack (optional but helpful)
Pro Tips & Common Mistakes
The biggest mistake I see people make with these cookies is overbaking them. They should look slightly underdone in the center when you pull them from the oven. I set a timer for 9 minutes and start checking them then—in my oven, 10.5 minutes is usually the sweet spot.
Another common issue is making the chocolate center too small. Don’t be shy! A generous amount of chocolate creates that dramatic molten center when warm. The first time I made them, I used just one mini chip per cookie (I was rationing my dwindling supply), and while they were still good, they lacked that “wow” factor.
If your dough feels too sticky to handle, refrigerate it for 15-20 minutes. Don’t add more flour! The slight chill will make it easier to work with while preserving the perfect texture.
For perfectly round cookies, use this baker’s trick I learned from my aunt: As soon as they come out of the oven, use a round cookie cutter or the rim of a glass that’s slightly larger than the cookies to gently swirl around each cookie. This corrects any irregular edges and gives you that picture-perfect shape.
Serving Suggestions
These cookies are at their absolute peak served warm, about 5-7 minutes after coming out of the oven, when the centers are perfectly molten. If you’re reheating them later, 10 seconds in the microwave brings back that gooey magic.
I love serving these with a small glass of cold milk—the contrast of temperatures is divine. For a more sophisticated dessert, try them with a scoop of vanilla ice cream between two cookies for the world’s most satisfying ice cream sandwich.
They also make an amazing afternoon pick-me-up with coffee or tea. When my energy dips around 3 PM, one of these with an espresso gets me through the rest of the workday without falling into a sugar crash later.
Reader Success Stories
“I made these for my kids’ playdate, and both the children AND parents were hovering around the cooling rack. One mom texted me at 10 PM for the recipe because her daughter insisted they make them again the next day!” – Rachel
“As someone with a massive sweet tooth but trying to eat more protein, these cookies are LIFE-CHANGING. I bring them to work and everyone thinks I’m having a regular dessert, but I’m secretly getting my protein in too!” – Michael
“My husband is a cookie snob and was extremely skeptical of ‘healthy cookies’ until he bit into one of these while still warm. The look on his face was priceless, and now he requests them weekly.” – Danielle
Storing & Freezing Guide
These cookies will stay soft and delicious for up to 3 days when stored in an airtight container at room temperature. After that, they start to lose their perfect texture. I find placing a piece of bread in the container helps keep them moist longer—an old trick my grandma taught me.
For longer storage, these freeze beautifully for up to 2 months. There are two freezing options:
- Freeze the baked cookies: Allow to cool completely, then freeze in a single layer before transferring to a freezer bag. Thaw at room temperature for about 30 minutes, then microwave for 10-15 seconds to revive the gooey center.
- Freeze the unbaked dough balls (my preferred method): Prepare the cookies with the chocolate centers, freeze on a baking sheet until solid, then transfer to a freezer bag. Bake directly from frozen, adding just 1-2 minutes to the baking time. This way, you can have fresh-baked cookies whenever the craving strikes!
FAQs
Can I use regular flour instead of oat flour? Yes, all-purpose flour works as a 1:1 substitute, though the cookies will have a slightly different flavor and texture. I’ve tried both, and while the oat flour version is my favorite, the regular flour version is still delicious.
My cookies spread too much. What went wrong? Most likely your dough was too warm. Pop it in the refrigerator for 15-20 minutes before shaping and baking. Also, different brands of peanut butter have varying oil content, which can affect spreading.
Can I make these vegan? I’ve successfully made these using a flax egg (1 tablespoon ground flaxseed mixed with 3 tablespoons water, let sit 15 minutes until gelled). The texture is slightly different but still delicious. Make sure your chocolate is dairy-free too.
Do I have to use Greek yogurt specifically? Greek yogurt works best because of its thickness and higher protein content. Regular yogurt has more moisture and will make the dough too wet. If you only have regular yogurt, strain it through a coffee filter for 30 minutes first to remove excess liquid.
Final Thoughts
Sometimes the best recipes come from necessity, limited ingredients, and a bit of panic. These healthy peanut butter Greek yogurt cookies with gooey chocolate centers have become my go-to when I want to impress without spending hours in the kitchen. There’s something almost magical about breaking open a warm cookie to reveal that melty chocolate center—it never fails to bring smiles.