
Introduction
I almost didn’t share this recipe. Seriously! This banana bread has been my secret weapon for years, and the combination of dark chocolate, peanut butter, and Greek yogurt creates something so incredibly special that I’ve been keeping it to myself. But here’s the twist – the oat flour makes it nutritious enough for breakfast while still tasting like dessert. Let me show you how to achieve that perfect moist center that’ll make your family think you’ve been taking secret baking classes.
Why You’ll Love This Recipe
- Only takes 15 minutes of prep time (I’m all about efficient baking!)
- Naturally sweetened with bananas and just a touch of honey
- Protein-packed from Greek yogurt and peanut butter – not your average banana bread
- The dark chocolate chunks melt into perfect little pockets of heaven
- Stays moist for days (if it lasts that long in your house)
- Sneakily nutritious – perfect for picky eaters or breakfast on-the-go
Ingredients Needed
- 2 ripe bananas (mashed)
- 1/2 cup Greek yogurt
- 1/4 cup peanut butter
- 1/4 cup honey or maple syrup
- 1 egg
- 1 teaspoon vanilla extract
- 1 cup oat flour
- 1/2 teaspoon baking soda
- 1/4 teaspoon salt
- 1/3 cup dark chocolate chunks
Ingredient Notes
Let’s talk about those bananas – they need to be spotty and overripe. You know, the ones your family refuses to eat. The browner the better! For the Greek yogurt, I prefer full-fat for maximum richness, but 2% works fine too. And the peanut butter? Creamy gives the smoothest texture, but if you’re team crunchy, go for it! You’ll just get little peanut surprises throughout your bread, which honestly isn’t a bad thing.
How to Make It
Step 1: Prep Your Station
Preheat your oven to 350°F and line a loaf pan with parchment paper, leaving a bit of overhang for easy removal. Trust me, I’ve made the mistake of skipping parchment and ended up with a bread that required surgical extraction from the pan. Nobody wants that drama!
Step 2: Mix the Wet Ingredients
In a large bowl, mash those bananas until they’re mostly smooth – I use a fork because who needs extra dishes to wash? Add the Greek yogurt, peanut butter, honey, egg, and vanilla. The mixture might look a little separated or curdled at first, but keep stirring until it’s relatively smooth. I wasn’t sure this would come together the first time I made it, but have faith!
Step 3: Add the Dry Ingredients
Now gently stir in the oat flour, baking soda, and salt. You don’t want to overmix here – I learned that the hard way with my first dense-as-a-brick loaf. Mix just until no dry streaks remain. The batter will be thicker than regular banana bread batter because of the yogurt and peanut butter, so don’t panic thinking you’ve done something wrong.
Step 4: Chocolate Time and Baking
Fold in those beautiful dark chocolate chunks. I like to reserve a small handful to sprinkle on top because, let’s be real, we eat with our eyes first. Pour the batter into your prepared pan, smooth the top, and bake for 40-45 minutes. You’ll know it’s done when a toothpick inserted in the center comes out mostly clean (a few moist crumbs are fine, but no wet batter).
Nutritional Information
- Calories: 215 per slice (based on 10 slices per loaf)
- Protein: 6g per slice
- Fat: 9g per slice (mostly the good kind from peanut butter!)
- Carbs: 29g per slice
- Sugar: 14g per slice (mostly from bananas and honey)
Key Ingredients Breakdown + Health Benefits
The bananas in this recipe aren’t just for flavor – they’re packed with potassium and fiber. I started using them more in baking after my doctor mentioned I needed more potassium in my diet. Who knew something so delicious could be good for you?
Greek yogurt adds protein and calcium while giving that tangy depth that makes this bread special. Honestly, I’ve tried making this with regular yogurt in a pinch, and it’s just not the same. The Greek variety gives it that unique richness that keeps me coming back for more.
Peanut butter is my personal obsession, but it’s also loaded with protein and healthy fats. My kids think they’re getting a treat, while I know they’re getting nutrients that will keep them full longer. Parenting win!
The oat flour makes this bread suitable for those avoiding traditional wheat flour, plus it adds a subtle nutty flavor and extra fiber. I discovered this substitution when my sister went gluten-free, and now I actually prefer it to regular flour in many recipes.
Why This Recipe Works
The science behind this banana bread is what makes it so special. The acidity in the Greek yogurt reacts with the baking soda to create a beautiful rise, while the fat from the peanut butter and yogurt keeps everything moist.
I’ve played with this recipe countless times, and the balance is key – too much peanut butter makes it dense, too little and you lose that flavor. The banana provides natural sweetness and moisture, which means we can use less added sweetener like honey.
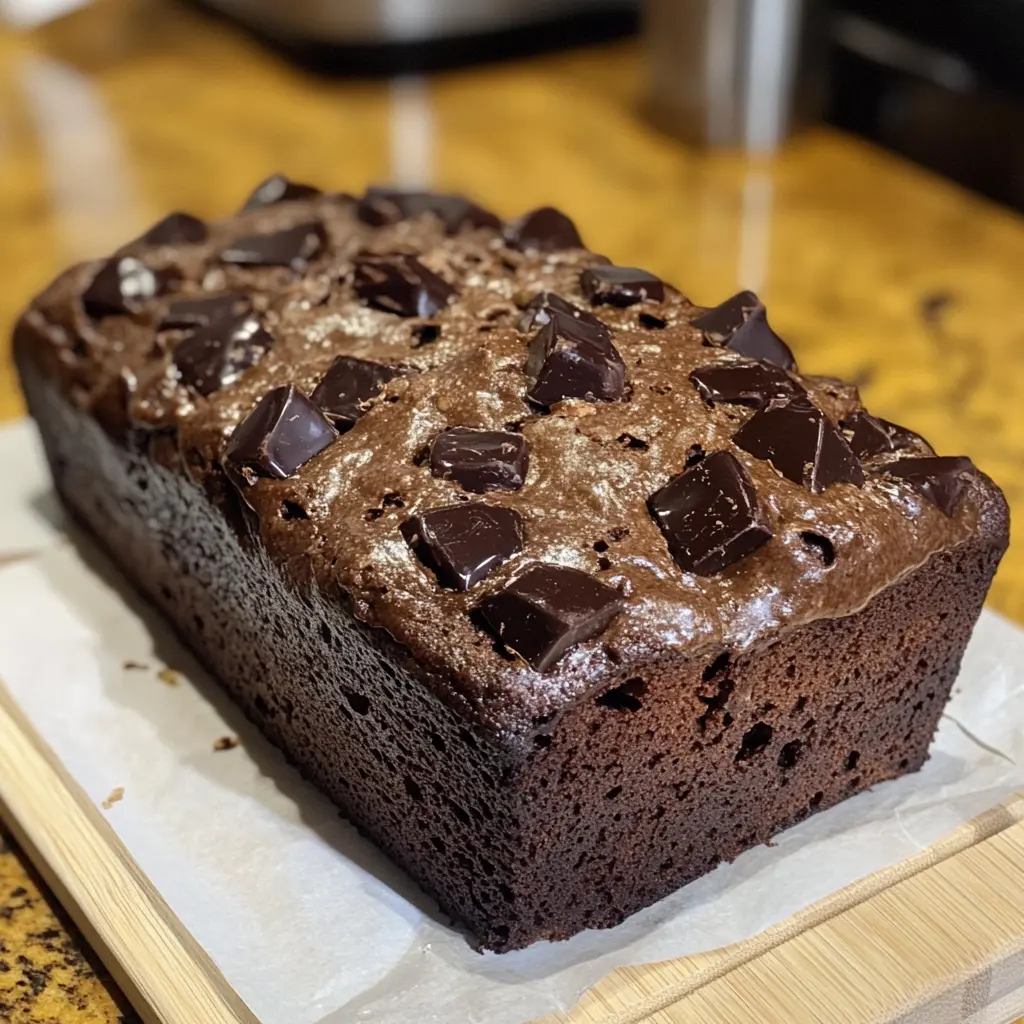
The chocolate chunks create these little pockets of melty goodness throughout, rather than blending into the batter like chips sometimes do. I discovered this trick when I ran out of chocolate chips one day and chopped up a chocolate bar instead. Best mistake ever!
Is This Recipe Right for You?
This bread is perfect for busy parents needing a quick breakfast option (I’ve been known to grab a slice as I rush out the door). It’s also great for athletes looking for a balance of carbs and protein in a delicious package. My husband takes it to work for his mid-morning snack and swears it keeps him full until lunch.
If you’re looking to incorporate more nutritious ingredients into your baking without sacrificing flavor, this recipe hits that sweet spot. I’ve served it to guests who had no idea they were eating something relatively healthy!
Who Should Avoid It?
Obviously, if you have a peanut allergy, this recipe isn’t for you (though I’ve included a sunflower seed butter variation below). It’s also not suitable for strict vegans due to the egg and yogurt. While the oat flour makes it gluten-free friendly, you’ll need to ensure your oats are certified gluten-free if you have celiac disease or severe sensitivity.
Customization Ideas
- Swap the peanut butter for almond butter or sunflower seed butter for a different flavor profile
- Add 1/2 teaspoon cinnamon and a pinch of nutmeg for a warming spice kick
- Mix in 1/4 cup chopped walnuts or pecans for extra texture (my husband’s favorite variation)
- Use dark chocolate chips instead of chunks if that’s what you have on hand
- Add 2 tablespoons of cocoa powder to the batter for a double chocolate experience
- Stir in 1/3 cup dried cranberries for a tart contrast (I discovered this combo last fall and it’s amazing)
Kitchen Tools You’ll Need
- 9×5 inch loaf pan (I use a metal one for better browning)
- Parchment paper
- Two mixing bowls (one for wet, one for dry ingredients)
- Measuring cups and spoons
- Fork for mashing bananas
- Rubber spatula (my most-used kitchen tool, honestly)
- Cooling rack
Nothing fancy required – that’s what I love about this recipe. I can make it even in my tiny vacation rental kitchen with minimal equipment.
Pro Tips & Common Mistakes
The number one mistake I see people make is using bananas that aren’t ripe enough. Those yellow bananas with no spots? They’ll make your bread bland and not sweet enough. Wait until they’re properly spotted for the best flavor – I promise it’s worth the patience!
Another common error is overmixing the batter once the flour is added. I used to beat everything together vigorously until I learned that this develops the gluten and leads to tough, dense bread. Now I mix just until combined and get a much better texture.
Not giving the bread enough time to cool can lead to disaster. The first time I made this, I was so excited that I tried to slice it after just 10 minutes, and it completely fell apart. Let it cool in the pan for at least 15 minutes, then on a rack until completely cool for clean slices.
If your bread isn’t cooked through after 45 minutes, your oven temperature might be off (I discovered this the hard way in my old apartment). Get an oven thermometer to check – they’re inexpensive and will save you so many baking fails.
Serving Suggestions
My favorite way to enjoy this bread is slightly warmed with a spread of extra peanut butter on top – I know, it already has peanut butter in it, but can you ever have too much? The answer is no.
For a quick breakfast, I’ll toast a slice and drizzle it with a little honey. My kids love it with a small smear of Nutella for a special treat (though then we’re definitely in dessert territory).
It pairs beautifully with a cold glass of milk or, for the adults, a steaming cup of coffee. On weekends, I’ll sometimes serve it with a side of Greek yogurt and fresh berries for a more substantial brunch option.
Reader Success Stories
Sarah from Portland wrote: “I’ve made this bread three times in the last month! My 6-year-old who normally picks out anything ‘healthy’ devours it without realizing it has Greek yogurt. The loaf doesn’t last more than two days in our house.”
Mike shared: “As someone who hits the gym regularly, I’ve been looking for protein-packed snacks that don’t come in a wrapper. This banana bread has become my go-to. I add a scoop of protein powder to the dry ingredients and it works perfectly.”
Jamie commented: “I was skeptical about the oat flour since I’ve had some dense, heavy baked goods with it before. But this bread is incredibly moist! I’ve started keeping overripe bananas in my freezer specifically for this recipe.”
Storing & Freezing Guide
This bread stays wonderfully moist for up to 4 days when stored in an airtight container at room temperature. I like to wrap it in a paper towel first, then place it in a container or zip-top bag – a trick my grandmother taught me for keeping baked goods fresh.
If you want to extend its life, pop it in the refrigerator where it will last for up to a week. Just be aware that refrigeration can sometimes dry out banana bread, so I recommend warming slices briefly in the microwave before eating.
For longer storage, this bread freezes beautifully! Slice it first, then wrap individual pieces in plastic wrap and store in a freezer bag. This way, you can thaw just what you need. A frozen slice will thaw at room temperature in about an hour, or you can microwave it for 20-30 seconds for instant gratification.
FAQs
Can I make this without peanut butter?
Absolutely! Any nut or seed butter works great. I’ve made it with almond butter and sunflower seed butter with excellent results. The flavor will change slightly, but the texture remains perfect.
My bread sank in the middle after baking. What went wrong?
This usually happens when the bread is underbaked or when the oven door is opened too early in the baking process. I’ve made this mistake myself – patience is key! Make sure to test with a toothpick before removing from the oven, and try not to peek before the 35-minute mark.
Can I make these as muffins instead?
Yes! I do this often for easy grab-and-go breakfasts. Use a lined muffin tin and bake at the same temperature for about 18-20 minutes. This recipe makes about 10-12 muffins depending on size.
Is this suitable for a diabetic diet?
While it’s lower in sugar than traditional banana bread, the natural sugars from bananas and honey still add up. My aunt who watches her blood sugar enjoys a small slice occasionally, but she pairs it with protein to balance the carb impact. Always best to check with your doctor!
Final Thoughts
This Dark Chocolate Peanut Butter Greek Yogurt Banana Bread has become such a staple in my household that my kids now get excited when they see bananas turning brown. It’s the perfect balance of nutritious and delicious – the holy grail of home baking, if you ask me.