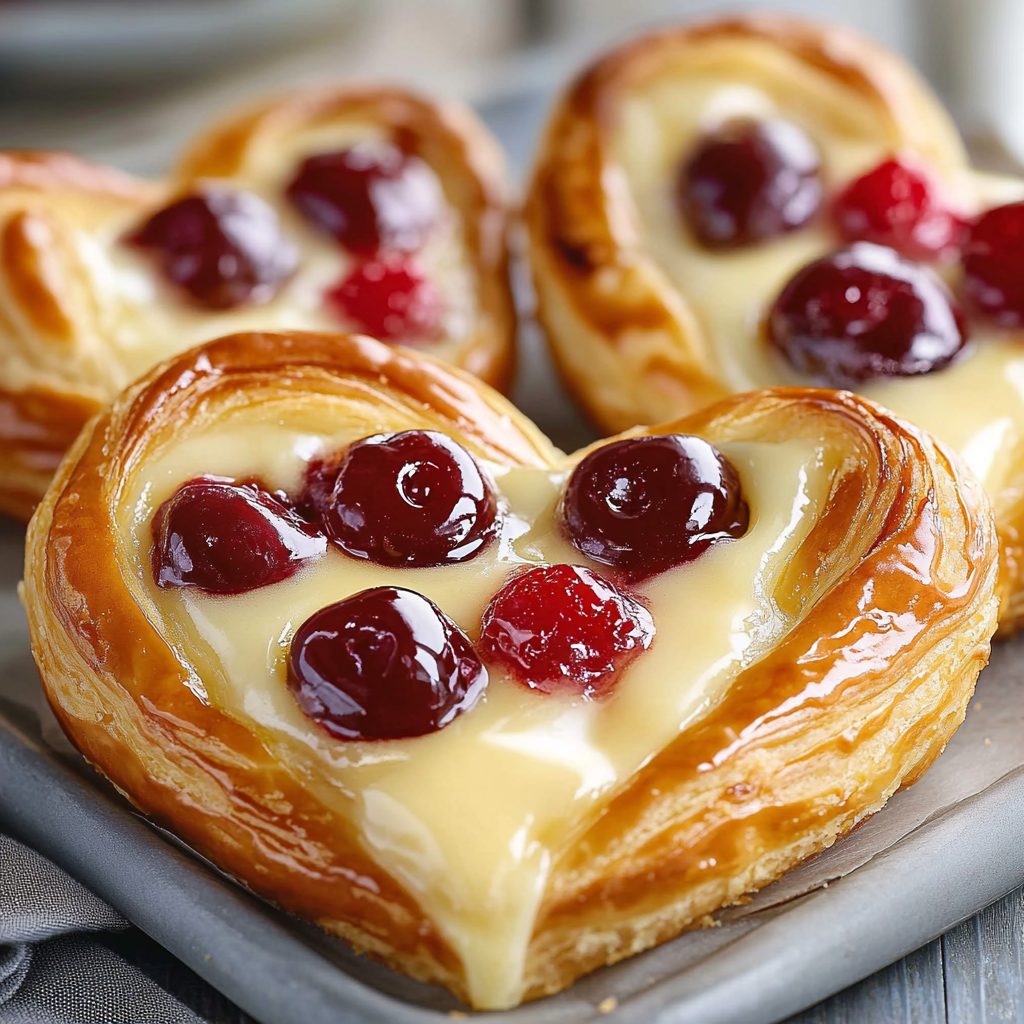
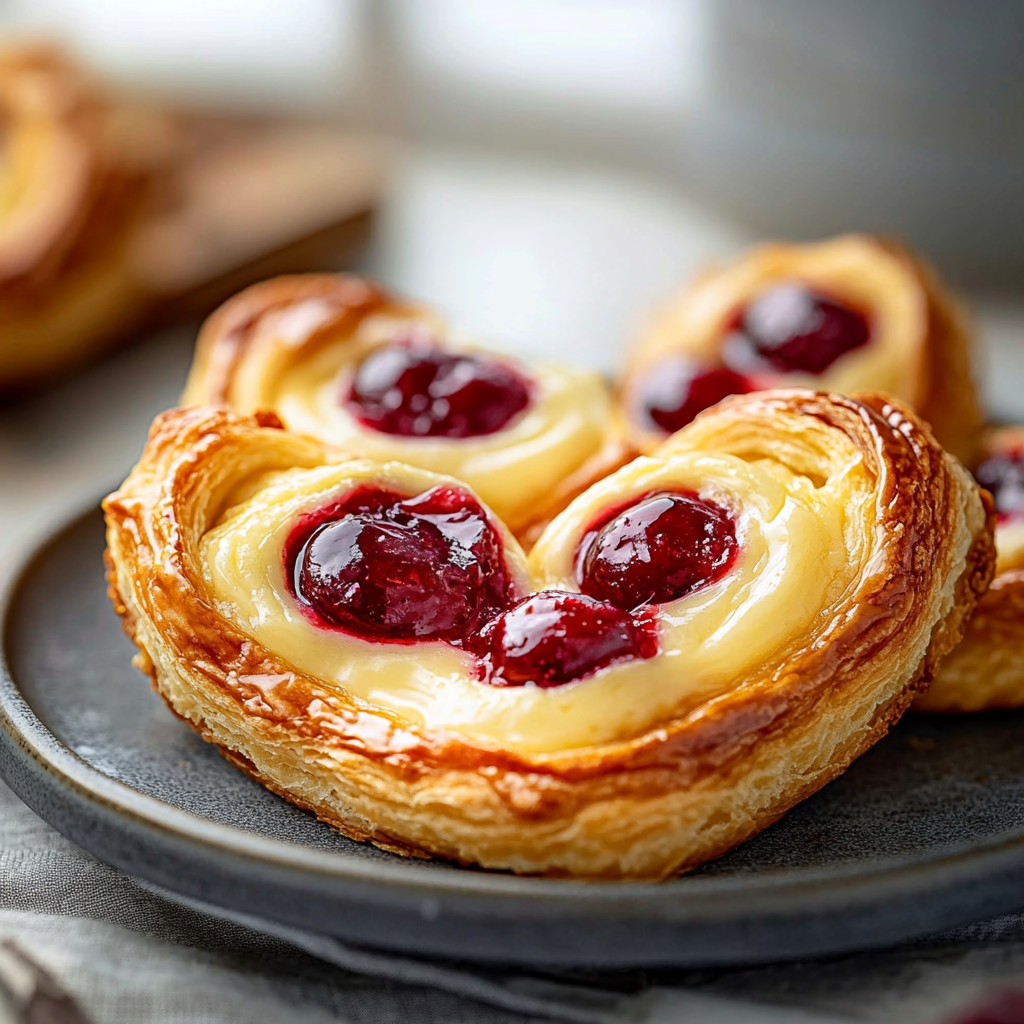
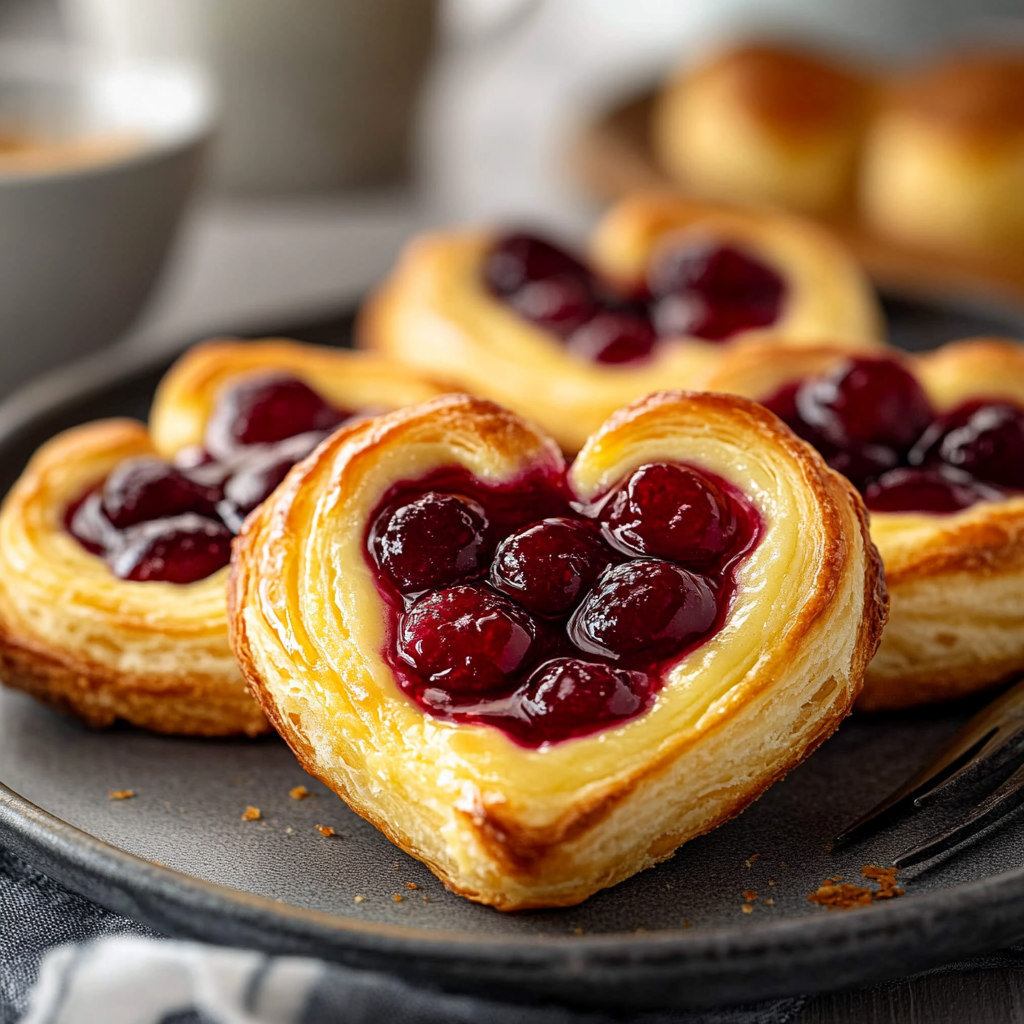
If you’re a fan of sweet pastries, then Cherry Cheese Danish should be at the top of your list of must-try treats. This irresistible pastry combines the rich, creamy goodness of cream cheese with the vibrant tartness of cherry filling, all encased in a buttery, flaky puff pastry. Whether you’re enjoying it as a weekend breakfast or serving it at a gathering, this Danish will not only satisfy your sweet tooth but also impress your guests with its delicate texture and flavor.
The beauty of a Cherry Cheese Danish lies in its simplicity. Made with puff pastry, which is effortlessly flaky and light, you can skip the time-consuming dough-making process by using store-bought puff pastry. You’ll also get the creamy, indulgent taste of the cream cheese filling, complemented by the refreshing and slightly tart cherry topping. Together, they create a perfect balance of textures and flavors that will leave everyone wanting more. This recipe is both easy to make and visually stunning, making it ideal for special occasions or just a treat to enjoy with your morning coffee.
In this blog, we will guide you through all the steps, from gathering the ingredients to perfecting your Cherry Cheese Danish, ensuring that you create a delicious dessert or breakfast treat that will become a new favorite. Ready to dive into the details? Let’s get started!
What You’ll Need
Before you get started, it’s essential to gather all the ingredients for your Cherry Cheese Danish. The recipe requires only a few simple ingredients that come together to create a stunning, decadent pastry. Here’s a breakdown of everything you’ll need:
For the Cream Cheese Filling:
- 8 oz cream cheese, softened – The key to the creamy filling. Make sure it’s softened for easy mixing.
- ½ cup granulated sugar – Adds sweetness to the cream cheese mixture.
- 1 tsp vanilla extract – For flavor depth.
- 1 egg yolk – Gives the filling a rich, smooth texture.
- 1 tbsp all-purpose flour – Helps to thicken the cream cheese filling.
For the Cherry Topping:
- 1 cup cherry preserves or pie filling – You can use store-bought cherry preserves, or if you prefer, make your own cherry topping with fresh or frozen cherries.
- 1 tbsp lemon juice – Enhances the flavor of the cherries.
For the Pastry:
- 1 package puff pastry (2 sheets), thawed – The secret to flaky, buttery layers.
- 1 egg, beaten – For brushing on the pastry, giving it a golden, glossy finish.
Optional Topping:
- Powdered sugar – For dusting over the top after baking for an extra touch of sweetness and a polished look.
How to Make
Creating your Cherry Cheese Danish is a straightforward process that combines puff pastry, a rich cream cheese filling, and a luscious cherry topping. By following these simple steps, you’ll have a fresh batch of Danishes ready to enjoy in no time!
Step 1: Prepare the Oven and Puff Pastry
Preheat your oven to 375°F (190°C). Line a baking sheet with parchment paper or a silicone baking mat to prevent the Danish from sticking. Once your puff pastry is thawed, unfold it onto a flat surface.
If your puff pastry comes in a large sheet, carefully cut it into smaller squares, about 4 to 6 squares, depending on the size you want for your Danish. If you prefer a more traditional shape, cut each square diagonally to form triangles, which will also give a nice presentation once baked.
Step 2: Prepare the Cream Cheese Filling
In a mixing bowl, beat the 8 oz cream cheese with ½ cup granulated sugar until smooth and well combined. Add 1 tsp vanilla extract, 1 egg yolk, and 1 tbsp all-purpose flour, and continue to mix until the filling is creamy and fully incorporated. The flour helps the mixture set during baking, ensuring it doesn’t ooze out of the pastry.
Once the cream cheese filling is smooth, set it aside and move on to the next step.
Step 3: Assemble the Danishes
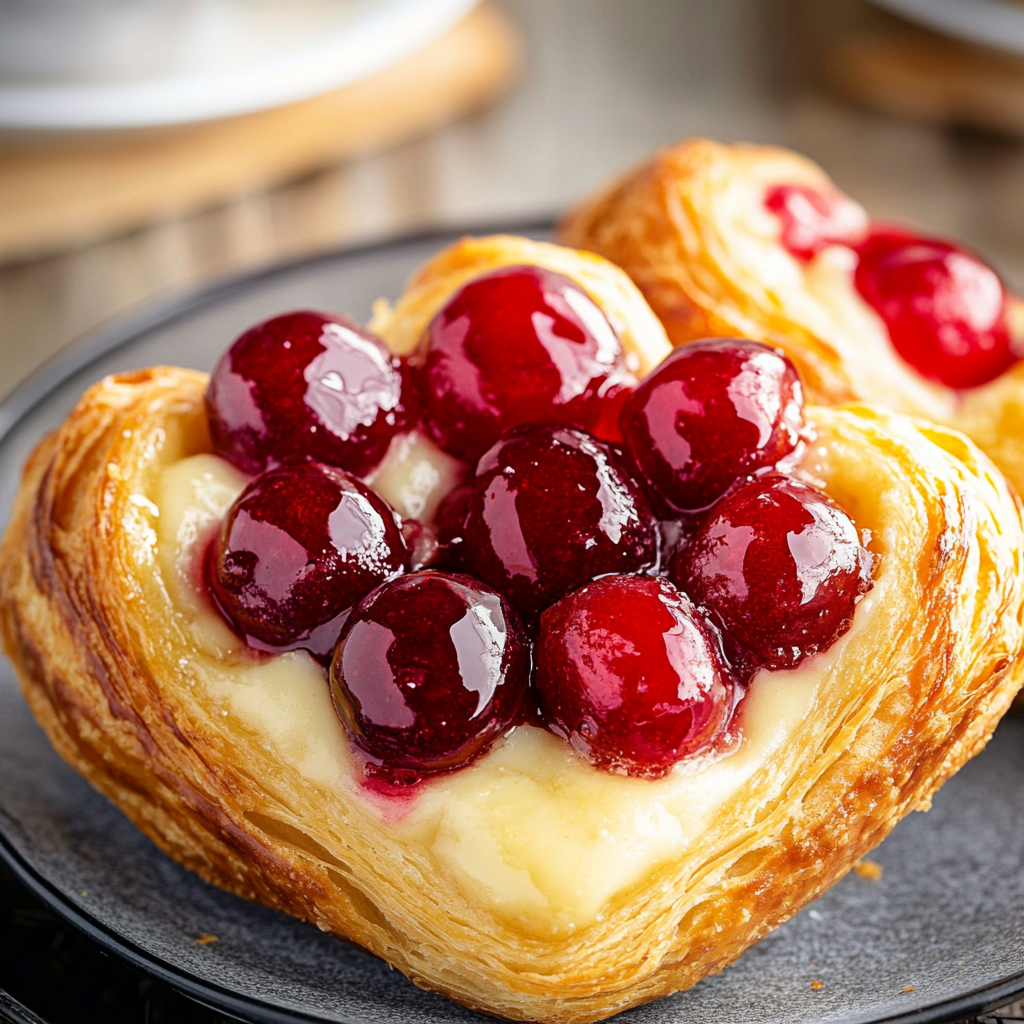
Take your puff pastry squares and gently press a slight indentation in the center of each piece. This will create a space to hold the cream cheese filling. Spoon about 1 tablespoon of the cream cheese filling into the center of each square or triangle.
Next, add about 1 tablespoon of cherry preserves or pie filling on top of the cream cheese layer. The sweet, tart cherries will balance the richness of the cream cheese perfectly.
Step 4: Bake the Danish
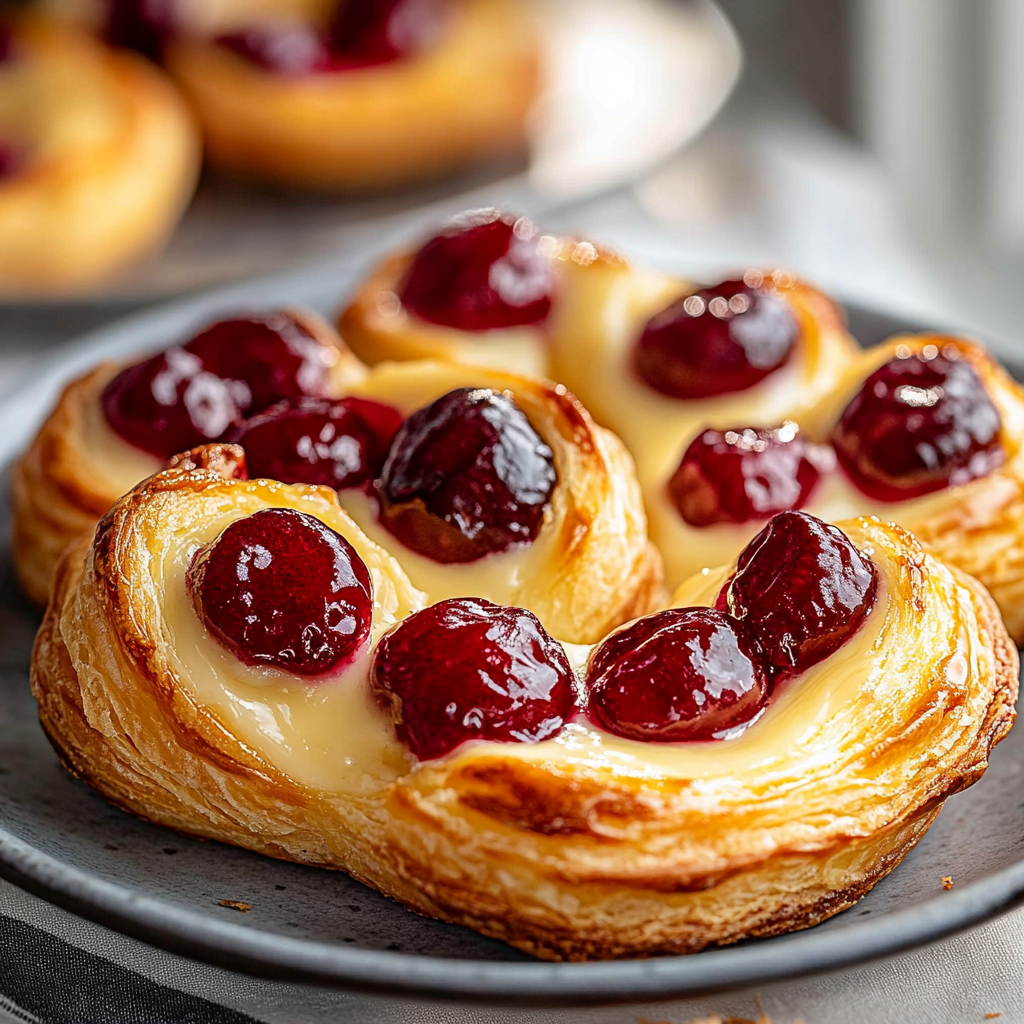
Brush the edges of the puff pastry with the beaten egg to give the Danish a beautiful, golden finish. Place the prepared pastries on the baking sheet, ensuring they have some space between them to allow for puffing.
Bake the Danishes in the preheated oven for 18-20 minutes, or until the pastry is golden brown and puffed up, and the filling has set. Keep an eye on them toward the end of the baking time to prevent over-browning.
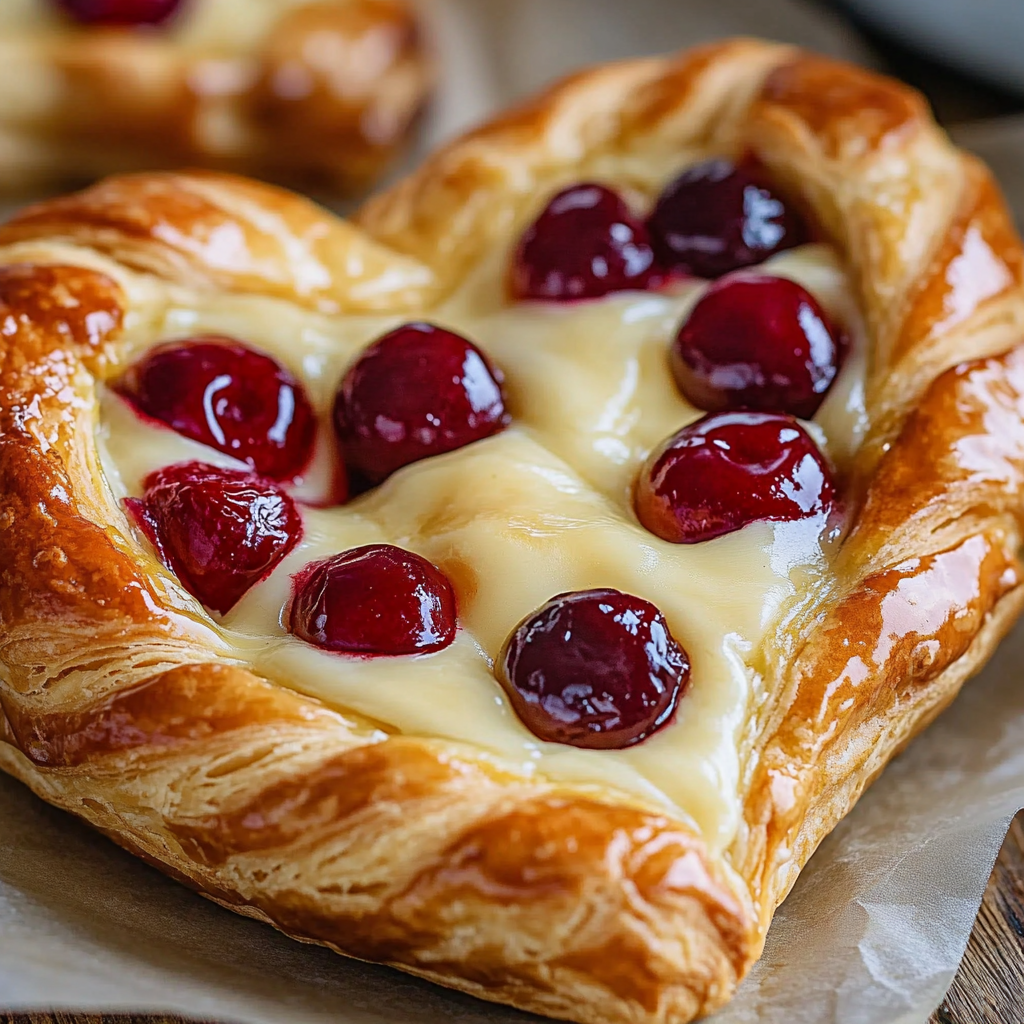
Step 5: Cool and Serve
Once the Danishes are golden and delicious, remove them from the oven and allow them to cool slightly on a wire rack. If you prefer, dust the tops with a light sprinkling of powdered sugar for a touch of sweetness and a beautiful presentation.
Serve warm or at room temperature, and enjoy with a hot cup of coffee or tea!

Serving and Storage Tips
These Cherry Cheese Danishes are best served fresh, straight from the oven, when the puff pastry is at its crispiest and the filling is at its creamiest. However, they are also delicious when stored and can be enjoyed later. Here’s how to serve and store them properly:
Serving:
- Warm or Room Temperature: Cherry Cheese Danishes are best served warm or at room temperature, as the puff pastry holds its flakiness and the cream cheese filling stays rich and creamy. You can reheat leftovers in the oven for a few minutes to bring back their crispiness.
- Pair with Drinks: These Danishes make an excellent breakfast item, but they’re also perfect for afternoon tea or as a dessert. Pair them with a cup of coffee, a latte, or even a refreshing glass of orange juice to complement the sweet and tart flavors.
Storage:
- Refrigeration: If you have leftovers, store them in an airtight container in the fridge. While the puff pastry won’t be as crispy the next day, the filling and cherry topping will still taste delicious.
- Freezing: If you want to freeze these Danishes for later, place them in a single layer on a baking sheet and freeze them for 1 hour before transferring them to an airtight container or freezer bag. They will keep in the freezer for up to 1 month. To reheat, bake them from frozen at 375°F (190°C) for about 15 minutes until hot and crispy.
Looking for something different? Try this!
Mistakes to Avoid
Making the perfect Cherry Cheese Danish requires some attention to detail, but with the right approach, you’ll be able to avoid common mistakes that can ruin your pastry. Here are a few pitfalls to watch out for:
1. Not Thawing the Puff Pastry Properly
Puff pastry needs to be thawed properly before using. If it’s too cold or too warm, it won’t puff up as it should when baked. Make sure to allow the puff pastry to thaw at room temperature for at least 30 minutes before working with it. This ensures it remains pliable but still cold enough to maintain its flaky layers when baked.
2. Overfilling the Pastry
It can be tempting to load up the puff pastry with too much cream cheese filling or cherry topping, but overfilling can lead to a messy bake. Stick to the recommended 1 to 2 tablespoons of cream cheese and 1 to 2 tablespoons of cherry preserves per pastry square. Overstuffing can cause the filling to spill out during baking, leading to uneven baking and soggy sections.
3. Underbaking or Overbaking
Baking the Danish for too long can cause the puff pastry to become overly dry, while underbaking may result in a soggy bottom. Keep an eye on your pastries in the oven, and be sure to check them toward the end of the baking time. Look for a golden-brown color and a slight puff to the pastry. The cream cheese filling should be set and firm, not runny.
4. Not Sealing the Edges Properly
If you’re making individual Danish, it’s important to seal the edges of the puff pastry thoroughly to keep the filling inside while baking. If the edges aren’t pinched together well enough, the filling may leak out, making the pastry soggy. Use your fingers to pinch the dough tightly, or press the edges with a fork to ensure they stay sealed during baking.
5. Skipping the Egg Wash
The egg wash not only gives the Danish a shiny, golden finish, but it also helps to seal the pastry and gives it a professional look. Don’t skip this step! Brush the tops of the pastries with a beaten egg before baking to achieve that beautiful golden color.
Looking for the perfect Cherry Brownie Cookies? Find it here.
Tips and Tricks
To make your Cherry Cheese Danish even more impressive, here are a few tips and tricks that will elevate your baking:
1. Make Ahead for Convenience
If you’re short on time, you can prepare the Danish ahead of time. Assemble the pastries (without baking them), cover with plastic wrap, and refrigerate overnight. When you’re ready to bake, simply preheat the oven and bake as directed. This is especially handy for breakfast or brunch events where you need a delicious pastry but don’t want to be stuck in the kitchen early in the morning.
2. Use Homemade Cherry Filling
While store-bought cherry preserves are quick and easy, making your own cherry filling can elevate the flavor of your Danish. You can simmer fresh or frozen cherries with sugar, a bit of lemon juice, and cornstarch to create a thick, flavorful topping. Homemade cherry filling will give your pastries a more authentic, from-scratch taste.
3. Add a Streusel Topping
For an extra layer of texture and sweetness, sprinkle a simple streusel topping over the Danish before baking. Combine flour, sugar, and cold butter, then crumble it over the top. The streusel will bake into the pastry, adding a delightful crunch that pairs beautifully with the creamy filling.
4. Try Different Fruits
While cherries are the traditional choice for this Danish, you can experiment with other fruits. Blueberries, raspberries, or even peaches make excellent alternatives to cherry topping. Mix and match to create a Danish with the fruit of your choice, adding variety to your baking repertoire.
5. Serve with Whipped Cream or Ice Cream
For an extra indulgence, serve your Cherry Cheese Danish with a dollop of freshly whipped cream or a scoop of vanilla ice cream. The creaminess of the whipped topping or ice cream complements the sweetness and richness of the Danish, making it a showstopper dessert for any occasion.

Get inspired to cook with these delectable dishes.
Suggestions
If you’re looking for variations or ways to enhance your Cherry Cheese Danish, here are a few suggestions that will add a personal touch and make the pastry even more enjoyable. You can tweak this recipe to suit your taste or use it as inspiration for future baking experiments.
1. Go for a Mixed Berry Danish
While cherries are a classic, you can also try using a combination of fresh berries. A mixed berry Danish with strawberries, blueberries, and raspberries offers a tangy, fruity topping that complements the creamy cheese filling. Adjust the sweetness based on the berries’ natural flavors for a balanced filling.
2. Add a Cinnamon Twist
For a warm, spiced touch, consider adding a sprinkle of ground cinnamon to the cream cheese filling or the cherry topping. The combination of cinnamon and cherries brings out a deeper, comforting flavor. You could even make a cinnamon swirl in the puff pastry for a delightful cinnamon and cherry combination.
3. Try a Lemon Cream Cheese Filling
For a zesty twist, substitute the vanilla extract with lemon zest in the cream cheese mixture. This will give the Danish a refreshing citrus flavor that pairs wonderfully with the sweet cherry topping. Lemon and cherry are a classic combination that always works well in desserts.
4. Make a Cherry Almond Danish
To add a nutty flavor, sprinkle some sliced almonds over the cherry topping before baking. The almonds will toast and provide a delightful crunch that contrasts nicely with the softness of the cream cheese filling. Almond extract in the cream cheese filling can also add a subtle flavor boost.
5. Use Puff Pastry for Other Desserts
While this Cherry Cheese Danish is a delicious treat, you can also use the same puff pastry base to create other kinds of pastries. Experiment with different fillings, like chocolate, apple cinnamon, or even Nutella, to create a variety of pastries for different occasions.
Find the perfect recipe of Savory French Onion Sausage Rolls for every occasion here.
FAQ
1. Can I use phyllo dough instead of puff pastry?
While phyllo dough is thinner and more delicate than puff pastry, you can use it as an alternative. However, it won’t produce the same flaky, buttery layers that puff pastry does. To make up for the difference, you can brush the phyllo dough with a little extra butter between the layers to achieve some flakiness.
2. Can I make Cherry Cheese Danish ahead of time?
Yes! You can assemble the Danish ahead of time, cover them with plastic wrap, and refrigerate them overnight. When you’re ready, bake them as directed. This is perfect for breakfast or brunch gatherings when you want to prepare the pastries the night before.
3. Can I use frozen cherries?
Yes, frozen cherries work well in this recipe. Just be sure to thaw them and drain off any excess liquid before using them in the topping. If using frozen cherries for homemade cherry filling, you may need to cook them a bit longer to thicken the sauce.
4. How do I prevent the filling from oozing out?
To keep the cream cheese filling and cherry topping from spilling out, make sure the puff pastry is sealed properly. When folding the edges, pinch them tightly, and consider pressing them with a fork to ensure a secure seal. Also, avoid overfilling the pastry to leave enough room for the filling to stay inside during baking.
5. How long will the Cherry Cheese Danish last?
Cherry Cheese Danish can be stored at room temperature for up to 2 days or refrigerated for up to 5 days. If you want to keep them longer, freeze individual servings and reheat them in the oven at 375°F for about 15-20 minutes.
Master the art of cooking with these tips and recipes.
Conclusion
Cherry Cheese Danish is a delightful, indulgent pastry that combines the sweetness of cherries with the rich, creamy texture of cream cheese, all wrapped in a flaky puff pastry. Whether you’re making them for breakfast, a brunch gathering, or just as an afternoon treat, these Danish pastries are sure to impress. They are easy to prepare, and by using store-bought puff pastry, you save time without sacrificing flavor.
This recipe is versatile, allowing for variations such as mixed berries, cinnamon, or even almonds. You can also experiment with different fillings and toppings to create your own signature Danish. The possibilities are endless, and the result is always a delicious, visually appealing pastry.
With a few simple ingredients and a little time, you can create a batch of Cherry Cheese Danish that will be loved by family and friends alike. Whether you’re an experienced baker or a beginner, this recipe is straightforward and rewarding. The next time you’re craving a sweet pastry, make sure to whip up these easy Cherry Cheese Danish and enjoy the perfect balance of buttery, flaky, creamy, and fruity goodness.
So, preheat your oven, gather your ingredients, and get ready to treat yourself and your loved ones to a batch of these irresistible pastries. They’re sure to become a new favorite in your baking repertoire!

Description
This Cherry Cheese Danish is a delightful pastry with a creamy, sweet cheese filling and a tangy cherry topping, all wrapped in flaky puff pastry. Perfect for breakfast, brunch, or a sweet afternoon treat!
- Preheat and Prepare: Preheat your oven to 375°F (190°C). Line a baking sheet with parchment paper. Unroll the puff pastry and cut it into squares or rectangles (around 4-6 pieces).
- Make the Cream Cheese Filling: In a bowl, combine cream cheese, sugar, vanilla extract, egg yolk, and flour. Beat until smooth and creamy.
- Assemble the Danish: Place each pastry square on the baking sheet. Spread 1-2 tbsp of the cream cheese mixture in the center of each square. Top with 1-2 tbsp of cherry preserves or pie filling.
- Fold and Seal: Fold the corners of the pastry over the filling, pinching the edges to seal. Brush the tops with the beaten egg for a golden finish.
- Bake: Bake for 20-25 minutes until the pastry is golden and puffed.
- Cool and Serve: Let the Danish cool slightly before serving. Optionally, dust with powdered sugar for extra sweetness.
Notes
- Make Ahead: You can assemble these Danish the night before, refrigerate them, and bake them fresh in the morning.
- Other Fillings: Feel free to substitute the cherry filling with any fruit preserves or fresh berries for variety.
- Egg Wash: For a shiny, golden top, don’t skip brushing the pastries with the egg wash before baking.
- Prep Time: 15 minutes
- Cook Time: 25 minutes
Nutrition
- Calories: 300
- Sugar: 10g
- Sodium: 150mg
- Fat: 20g
- Carbohydrates: 28g
- Protein: 4g
- Cholesterol: 60mg