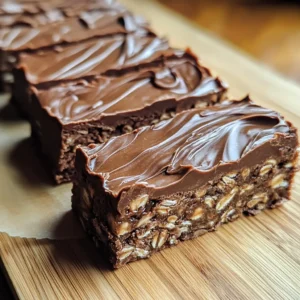
Introduction
These bars saved my sanity. No joke! I created them during that heatwave last summer when turning on the oven seemed like cruel and unusual punishment. The secret? Greek yogurt gives them a protein boost while keeping them creamy without heavy cream or butter. Let me show you how to make the perfect chilled treat that satisfies both your sweet tooth and your health goals.
Why You’ll Love This Recipe
✅ No Oven Required : Perfect for hot summer days when turning on the oven feels like torture!
✅ 10-Minute Prep : Throw it together, let the freezer do the work, and you’re done.
✅ Sneaky Protein Boost : Each bar packs a protein punch that’ll actually keep you satisfied.
✅ Kid-Approved Healthy Snack : My 8-year-old calls these “chocolate bars” and has no idea they’re good for him.
✅ Meal Prep Dream : Make Sunday, enjoy all week for breakfasts and snacks.
✅ Customizable Base : Once you master the basic recipe, the flavor variations are endless (more on this later!).
Ingredients Needed
- 1/2 cup Greek yogurt (plain)
- 1/3 cup peanut butter
- 1/4 cup honey or maple syrup
- 1 teaspoon vanilla extract
- 1 cup rolled oats
- 1/4 cup cocoa powder
- Pinch of salt
Ingredient Notes
For the Greek yogurt, I strongly recommend whole milk for the creamiest texture, though 2% works in a pinch. I’ve tried with non-fat, and honestly, the bars just weren’t as satisfying. The peanut butter should be the natural, drippy kind without added sugar – trust me, we’re adding enough sweetness elsewhere. As for the oats, old-fashioned rolled oats give the best texture; quick oats make the bars too dense, and steel-cut won’t soften properly.
How to Make It
Step 1: Prep Your Base
Line a small 8×8 inch pan with parchment paper, leaving some overhang for easy removal later. This step seems minor but I’ve learned the hard way – trying to dig these bars out of an unlined pan is a frustrating exercise in futility! Make sure your parchment reaches all four sides.
Step 2: Mix The Wet Ingredients
In a medium bowl, combine the Greek yogurt, peanut butter, honey (or maple syrup), and vanilla extract. Stir until completely smooth and creamy. The first time I made these, I was impatient and left peanut butter lumps – not a great surprise when biting into what should be a uniform bar!
Step 3: Add Dry Ingredients
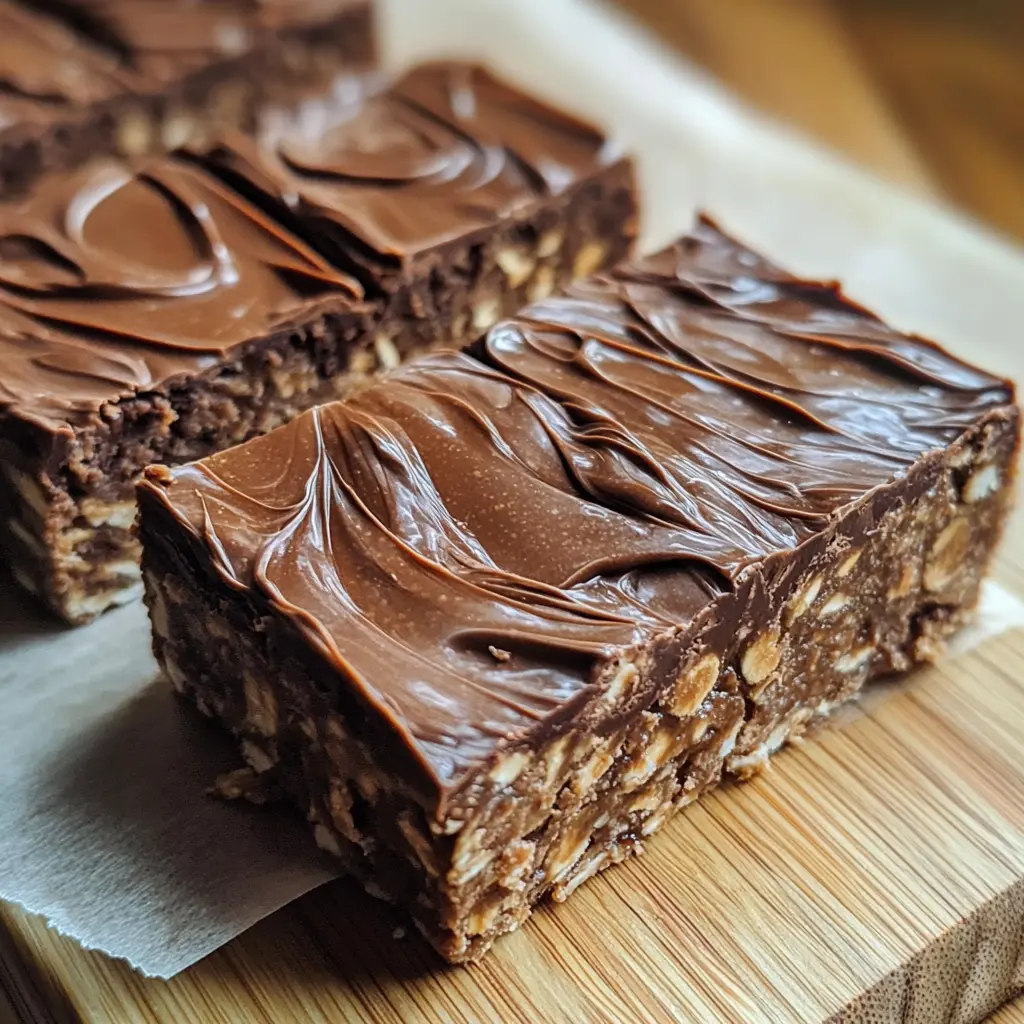
Add the cocoa powder and salt to your wet mixture, stirring until no dry streaks remain. The mixture will darken and get quite thick. Now fold in the oats, making sure every piece gets coated in the chocolate mixture. I wasn’t sure this would work the first time – it looked too dry – but keep folding and I promise it comes together!
Step 4: Chill and Set
Press the mixture firmly into your prepared pan, using the back of a measuring cup to really compact it (I learned this trick after my first batch crumbled). The more you press, the better they’ll hold together later. Cover with plastic wrap and freeze for 1-2 hours until firm. Don’t skip the freezing step – I tried refrigerating once and ended up with a sticky mess.
Nutritional Information
Each bar (assuming 8 bars per batch) contains approximately:
- Calories: 175
- Protein: 7g
- Fat: 8g
- Carbs: 22g
- Fiber: 3g
- Sugar: 11g (mostly from honey)
These numbers make me feel so much better about reaching for a second bar – which happens more often than I’d like to admit!
Key Ingredients Breakdown + Health Benefits
Greek yogurt is the unsung hero of these bars. It adds protein and calcium while creating a creamy texture without heavy cream. When I was trying to up my protein intake during marathon training last year, these bars became my go-to snack. The probiotics in yogurt are also great for gut health – something my sensitive stomach truly appreciates.
Peanut butter brings healthy fats and more protein to the table. I started using natural peanut butter in all my recipes after reading about the additives in conventional brands. The difference in taste is remarkable – so much more peanutty and rich! Plus, the healthy fats keep me satisfied much longer than my old granola bar habit.
Oats provide complex carbohydrates and fiber that give these bars staying power. My kids used to crash an hour after their after-school snack until I started incorporating more oats into our treats. Now they have sustained energy for soccer practice, and I don’t hear “I’m hungryyyyy” every 20 minutes.
Cocoa powder isn’t just for flavor – it’s packed with antioxidants and magnesium. I started adding it to more recipes after my doctor mentioned I was deficient in magnesium. Who knew addressing a health concern could taste so good? The slight bitterness of cocoa also perfectly balances the sweetness in these bars.
Why This Recipe Works
The science behind these bars is actually fascinating. The protein in Greek yogurt and the fat in peanut butter create a binding effect that holds everything together without needing eggs or flour. I discovered this by accident when trying to salvage an overly dry granola recipe!
The texture layering is what makes these bars special. The creaminess from the yogurt and peanut butter contrasts beautifully with the slight chew from the oats. It’s this textural contrast that keeps you coming back for more – at least that’s my excuse!
Freezing is crucial because it allows the mixture to firm up to the perfect consistency. Too little time, and the bars are too soft; too much time, and they become too hard to enjoy. After much testing (and many batches later), I found that 90 minutes is the sweet spot in my freezer.
The flavor balance is what I’m most proud of – just enough honey to sweeten without overwhelming the nutty, chocolate notes. When my chocolate-obsessed husband says they’re perfect, I know I’ve nailed it.
Is This Recipe Right for You?
These bars are perfect for busy parents who need portable, nutritious snacks for themselves and their kids. My daughter’s soccer team demolished a double batch after their tournament!
They’re also ideal for fitness enthusiasts looking for a balanced post-workout snack. The 3:1 carb-to-protein ratio is actually recommended by sports nutritionists for optimal recovery – a happy accident in my recipe development.
If you’re trying to incorporate more whole foods into your diet without giving up treats entirely, these bars hit that sweet spot. My neighbor who’s “not a healthy food person” requests these whenever she comes over for coffee.
Who Should Avoid It?
Obviously, if you have a peanut allergy, this recipe isn’t for you in its original form (though I’ve included substitution ideas below). Those with severe gluten intolerance should ensure their oats are certified gluten-free, as cross-contamination can occur during processing. And if you’re following a strict low-carb or keto diet, the oats and honey might not fit your macros, though I do have a keto friend who makes them with allulose and almond flour.
Customization Ideas
- Swap the peanut butter for almond butter, sunflower seed butter, or cashew butter
- Add 2 tablespoons of chia seeds or ground flaxseed for extra fiber and omega-3s
- Mix in 1/4 cup of mini chocolate chips for double chocolate goodness
- Sprinkle 2 tablespoons of shredded coconut into the mixture for tropical flair
- Add 1/2 teaspoon of cinnamon and a pinch of cayenne for a Mexican chocolate twist
- Fold in 2 tablespoons of chopped dried cherries or cranberries for tartness
- For a protein boost, add 2 tablespoons of your favorite unflavored protein powder
Kitchen Tools You’ll Need
You don’t need fancy equipment for these bars, which is part of their charm! Here’s what I use:
- 8×8 inch square pan (a loaf pan works too for thicker bars)
- Parchment paper
- Medium mixing bowl
- Measuring cups and spoons
- Rubber spatula (my most-used kitchen tool!)
- Plastic wrap or reusable silicone cover
- Sharp knife for cutting the chilled bars
I love recipes like this that don’t require dragging out the stand mixer or food processor – especially in summer when my kitchen is already too hot!
Pro Tips & Common Mistakes
The biggest mistake people make with these bars is not pressing the mixture firmly enough into the pan. The first time I made them, they crumbled when I tried to cut them. Now I use the bottom of a measuring cup and really compact the mixture – much better results!
Another common error is using cold ingredients straight from the fridge. Let your Greek yogurt and peanut butter come to room temperature for about 15 minutes before mixing. When I’m impatient and skip this step, the mixture doesn’t combine as smoothly.
Watch the freezing time carefully. I once forgot about a batch and left them in the freezer overnight – they were so hard I nearly broke my knife! If this happens to you, let them thaw for about 10 minutes before attempting to cut or eat them.
Use natural peanut butter without added sugar, but make sure it’s well-stirred before measuring. I’ve had batches turn out too oily or too dry when I didn’t properly mix the separated peanut butter first. That layer of oil on top needs to be fully incorporated!
Serving Suggestions
These bars are perfectly delicious on their own, but I love serving them with a small drizzle of extra peanut butter on top when I’m feeling fancy. My husband prefers his with a glass of cold almond milk – the combination is reminiscent of dunking cookies, but much healthier.
For breakfast on the go, I’ll grab a bar and a piece of fruit. The combination of the protein-rich bar and the fresh fruit makes for a surprisingly satisfying morning meal when I’m racing out the door.
They also make a great after-school snack for kids. My daughter’s friends always ask what the “chocolate squares” are, and their parents are shocked when I tell them how nutritious they are. For summer picnics, I pack these in a cooler with ice packs – they’re actually refreshing when the temperature soars.
Reader Success Stories
Emma from Seattle wrote: “I’ve been making these every Sunday for the past month. My teenagers actually request them for their lunch boxes, which is a miracle for anything with the word ‘healthy’ attached to it. I add a few chocolate chips to make them extra appealing.”
Mark shared: “As someone who works out regularly but hates complicated meal prep, these bars have been a game-changer. I double the recipe and have post-workout snacks sorted for the week. Added bonus: they satisfy my sweet tooth without derailing my nutrition goals.”
Priya commented: “My 3-year-old helps me make these, and she loves mashing everything together. We call them ‘chocolate play-dough’ while making them. It’s our special cooking project, and she actually eats them because she helped – win-win for this tired mom!”
Storing & Freezing Guide
After the initial freezing to set the bars, transfer them to the refrigerator where they’ll keep beautifully for up to 5 days. I store mine in an airtight container with parchment paper between layers to prevent sticking.
For longer storage, these bars freeze exceptionally well (they were born in the freezer, after all!). Wrap individual bars in plastic wrap or parchment, then place in a freezer bag. They’ll keep for up to 3 months, though they’ve never lasted that long in my household!
To thaw, simply transfer a bar from the freezer to the refrigerator overnight, or let sit at room temperature for about 15-20 minutes. I’ve found that they’re actually quite enjoyable eaten slightly frozen on hot summer days – almost like a healthy fudgesicle!
FAQs
Can I use flavored Greek yogurt instead of plain?
You can, but be aware it will add sugar and change the flavor profile. I tried vanilla Greek yogurt once, and while delicious, the bars were noticeably sweeter. If using flavored yogurt, consider reducing the honey or maple syrup by half.
My bars are too crumbly. What went wrong?
This usually happens when there’s not enough moisture or binding agent. Make sure you’re using the full amount of yogurt and peanut butter, and really press the mixture firmly into the pan. Also, check that you’re using rolled oats, not instant or steel-cut, as these affect the texture dramatically.
Can I make these vegan?
Absolutely! I’ve made these for my vegan neighbor using dairy-free coconut yogurt and maple syrup instead of honey. The texture is slightly different—a bit softer—but equally delicious. Just make sure your cocoa powder is certified vegan if that’s important to you.
How can I make these more kid-friendly?
While my kids love these as is, I sometimes add 2 tablespoons of mini chocolate chips to the mixture or sprinkle them on top before freezing. For younger children who might find the cocoa powder too bitter, you can reduce it to 2-3 tablespoons and increase the honey slightly.
Final Thoughts
These Healthy No-Bake Greek Yogurt Peanut Butter Chocolate Oatmeal Bars have become my secret weapon for healthy snacking. They’ve survived multiple iterations in my kitchen, and this version has the perfect balance of nutrition and indulgence. There’s something so satisfying about creating a treat that satisfies chocolate cravings while providing actual nourishment.